Python programs and environments
✎Modified 2019-09-23 by Andrea Censi
Learn how to setup a Python project and associated tools.
We assume you are already quite comfortable with Python. Nevertheless, when you work with big and complex projects, there are some subtleties that you must consider and some handy tools that can make your life easier. Let’s take a look at some of these now.
Developer knowledge of Python.
Define a basic project structure
✎Modified 2022-12-13 by Liam Paull
In Duckietown, everything runs in Docker containers. All you need in order to run a piece of software in Duckietown is a Duckietown-compliant Docker image with your software in it.
A boilerplate is provided by the following repository.
The repository contains a lot of files, but do not worry, we will analyze them one by one. Click on the green button that says “Use this template”.

This will take you to a page that looks like the following:
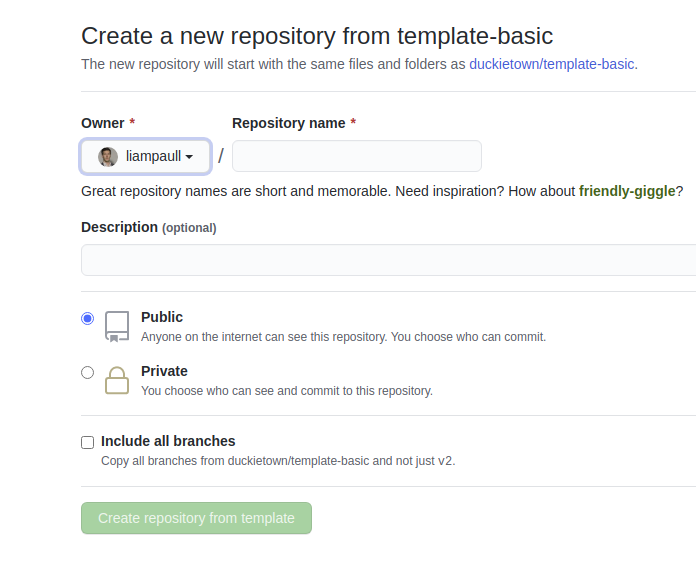
Pick a name for your repository (say my-program) and press the button Create repository from template. Note, you can replace my-program with the name of the repository that you prefer, make sure you use the right name in the instructions below.
This will create a new repository and copy everything from the repository template-basic to your new repository. You can now open a terminal and clone your newly created repository.
laptop $ git clone https://github.com/YOUR_NAME/my-program
laptop $ cd my-program
Replace YOUR_NAME in the link above with your GitHub username.
The repository contains already everything you need to create a Duckietown-compliant Docker image for your program. The only thing we need to change before we can build an image from this repository is the repository name in the file Dockerfile. Open it using the text editor you prefer and change the first line from:
ARG REPO_NAME="REPO_NAME_HERE"
to
ARG REPO_NAME="my-program"
and then similarly update the DESCRIPTION and the MAINTAINER ARGs.
Save the changes. We can now build the image, even though there is not going to be much going on inside it until we place our code in it.
Now, in a terminal, move to the directory created by the git clone instruction above and run the following command(beware that it might take some time):
laptop $ dts devel build -f
If the above command is not recognized, you will first have to install it with dts install devel.
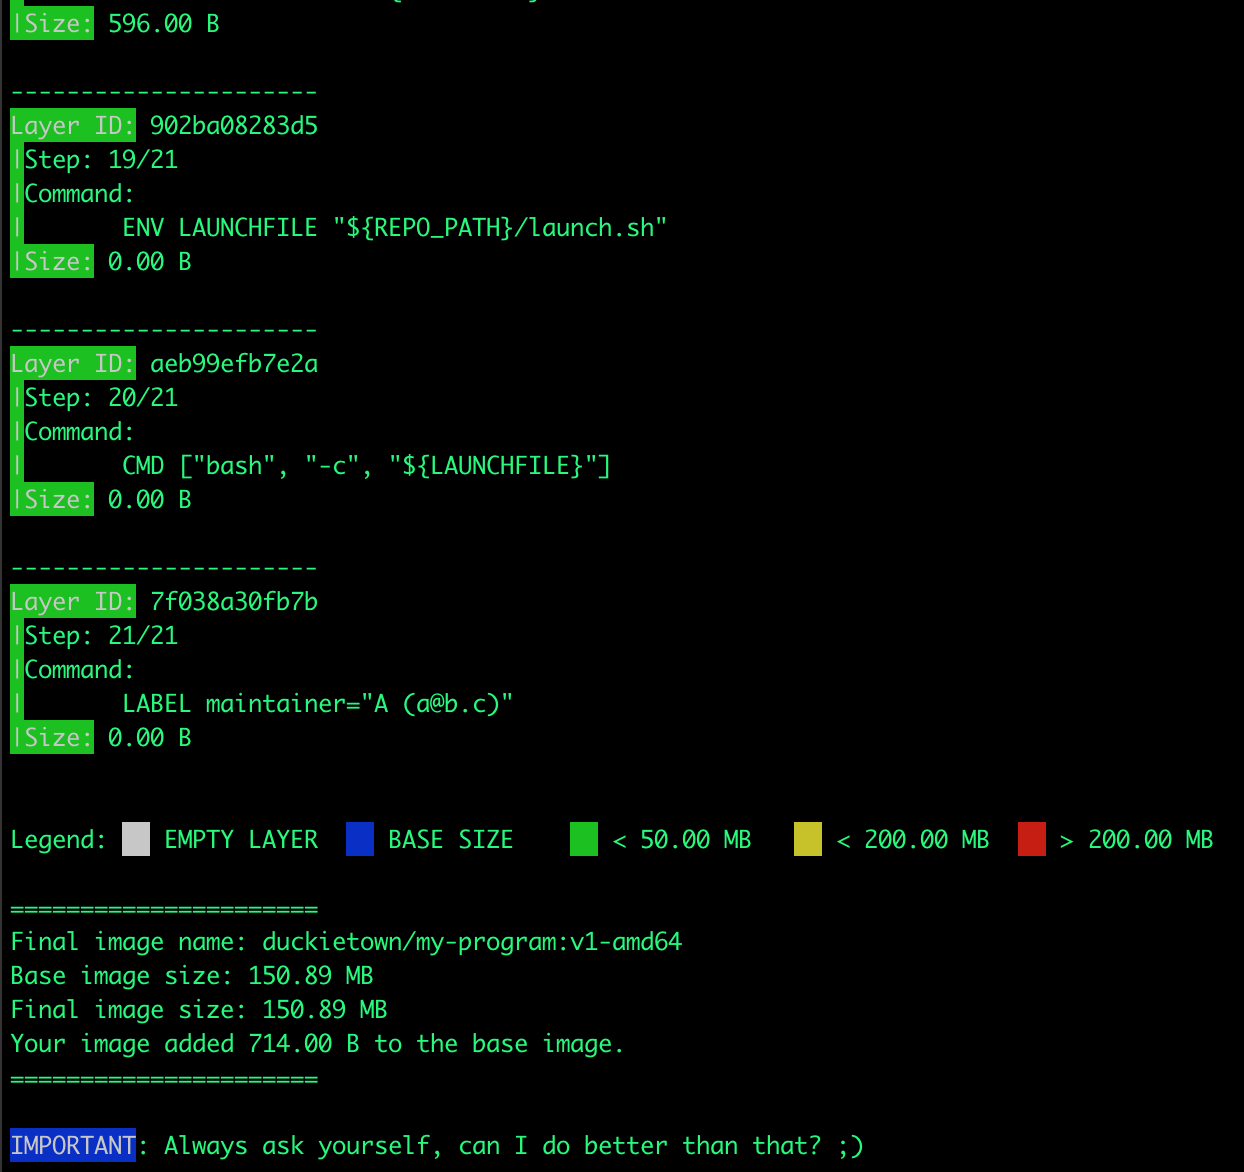
If you correctly installed Docker and dts, you should see a long log that ends with something like (but not necessary exactly like) the following:
You can now run your container by executing the following command.
laptop $ dts devel run
This will show the following message:
The environment variable VEHICLE_NAME is not set. Using 'LAPTOP_HOSTNAME'.
WARNING: robot_type file does not exist. Using 'duckiebot' as default type.
WARNING: robot_configuration file does not exist.
=> Launching app...
This is an empty launch script. Update it to launch your application.
<= App terminated!
Congratulations! You just built and run your first Duckietown-compliant Docker image.
Run a basic program on your Laptop
✎Modified 2020-10-02 by arsimone
Now that we know how to build a Docker image for Duckietown, let’s put some code in one of them.
We will see how to write a simple Python program, but any language should do it.
Open a terminal and go to the directory my-program created above. In Duckietown, Python code must belong to a Python package. Python packages are placed inside the directory code in my-program. Let go ahead and create a directory called my_package inside packages.
laptop $ mkdir -p ./packages/my_package
A Python package is simply a directory containing a special file called __init__.py. So, let’s turn that my_package into a Python package.
laptop $ touch ./packages/my_package/__init__.py
Now that we have a Python package, we can create a Python script in it. Use your favorite text editor to create the file ./packages/my_package/my_script.py and place the following code inside it.
message = "Hello World!"
print(message)
We now need to tell Docker we want this script to be the one executed when we run the command docker run. In order to do so, open the file ./launchers/default.sh and replace the line
echo "This is an empty launch script. Update it to launch your application."
with the line
dt-exec python3 -m "my_package.my_script"
Always prepend dt-exec to the main command in ./launchers/default.sh.
If you are curious about why that is important, we can tell you that it helps us deal with an interesting problem called “The zombie reaping problem” (more about this in this article).
You can also create different custom executable scripts, if you want to know more about that check out the file ./readme.md.
Let us now re-build the image:
laptop $ dts devel build -f
and run it:
laptop $ dts devel run
This will show the following message:
The environment variable VEHICLE_NAME is not set. Using '774a2521b42e'.
Adding /code/my-program to PYTHONPATH
Adding /code/dt-commons to PYTHONPATH
Activating services broadcast...
Done!

Hello World!

Deactivating services broadcast...
Done!
Congratulations! You just built and run your own Duckietown-compliant Docker image.
Run a basic program on your Duckiebot
✎Modified 2020-10-11 by arsimone
Now that we know how to package a piece of software into a Docker image for Duckietown, we can go one step further and write code that will run on the robot instead of our laptop.
This part assumes that you have a Duckiebot up and running with hostname MY_ROBOT. Of course you don’t need to change the hostname to MY_ROBOT, just replace it with your robot name in the instructions below. You can make sure that your robot is ready by executing the command
laptop $ ping MY_ROBOT.local
If we can ping the robot, we are good to go.
Let us go back to our script file my_script.py and change it to:
import os
message = "Hello from %s!" % os.environ['VEHICLE_NAME']
print(message)
We can now modify slightly the instructions for building the image so that the image gets built directly on the robot instead of your laptop or desktop machine. Run the command
laptop $ dts devel build -f --arch arm32v7 -H MY_ROBOT.local
As you can see, we changed two things, one is --arch arm32v7 which tells Docker to build an image that will run on ARM architecture (which is the architecture the CPU on the robot is based on), the second is -H MY_ROBOT.local which tells Docker where to build the image.
Once the image is built, we can run it on the robot by running the command
laptop $ docker -H MY_ROBOT.local run -it --rm --net=host duckietown/my-program:latest-arm32v7
Please take into consideration that the image tag may be different, you can check the correct image name and tag in the end of the output the build command. If everything worked as expected, you should see the following output,
The environment variable VEHICLE_NAME is not set. Using 'MY_ROBOT'.
Adding /code/my-program to PYTHONPATH
Adding /code/dt-commons to PYTHONPATH
Activating services broadcast...
Done!

Hello from MY_ROBOT!

Deactivating services broadcast...
Done!
Congratulations! You just built and run your first Duckietown-compliant and Duckiebot-compatible Docker image.
Install dependencies using package managers (e.g., apt, pip)
✎
Modified 2019-09-23 by Andrea Censi
It is quite common that our programs need to import libraries, thus we need a way to install them. Since our programs reside in Docker images, we need a way to install libraries in the same image.
The template provided by Duckietown supports two package managers out of the box:
- Advanced Package Tool (
apt) - Pip Installs Packages for Python3 (
pip3)
List your apt packages or pip3 packages in the files dependencies-apt.txt
and dependencies-py3.txt respectively before running the command dts devel build.
Basic NumPy program
✎Write a program that performs the sum of two numbers using NumPy.
Add numpy to the file dependencies-py3.txt to have it installed in the Docker image.
Here you go! Now you can handle pip dependencies as well!