Duckiebot Development using Docker
✎Modified 2020-01-27 by Susanne Keller
The following section will guide you through the Docker development process.
Prerequisites
✎Modified 2019-09-22 by Andrea Censi
Those who wish to use a physical Duckiebot will need these physical objects:
-
Duckiebot
- Raspberry Pi 3B+
- Micro SD card (16GB+ reccommended)
-
Personal computer
- Internet-enabled router
- MicroSD card adapter
To interact with the Duckiebot, the computer must have the following software:
- POSIX-compliant shell
- Browser and/or Docker CE
Installation
✎Modified 2021-10-23 by Andrea Censi
-
Software Prerequisites (Ubuntu/Debian):
wget/curlapt-getduckietown-shell- Docker (See Unit H-1 - Introduction to Docker for Robotics and Machine Learning for installation instructions)
First, you will need to set your Duckietoken:
$ dts tok set
Now, ensure that you have a valid Duckietoken:
$ dts tok verify $TOKEN

0 -> good   JSON {'uid': number, 'exp': date}
1 -> bad  error message
Place the Duckiebot’s MicroSD card into the MicroSD card adapter, insert it into the computer and run the following command:
$ dts init_sd_card
The above command runs the init_sd_card.sh script, which will run an installer to prepare the SD card.
Follow the instructions, then transfer the SD card to the Raspberry Pi and power on the Duckiebot. On first boot, make sure the Raspberry Pi receives continuous power for at least five or ten minutes.
TODO: give some sign of life, maybe LEDs.
Your laptop should be connected to the same network as the Duckiebot, or alternately, you will need to share internet from your laptop to your Duckiebot via an ethernet cable. Further details are described in the Duckiebot networking chapter.
Wait for a minute or so, and then visit the following URL:
http://DUCKIEBOT_NAME.local:9000/
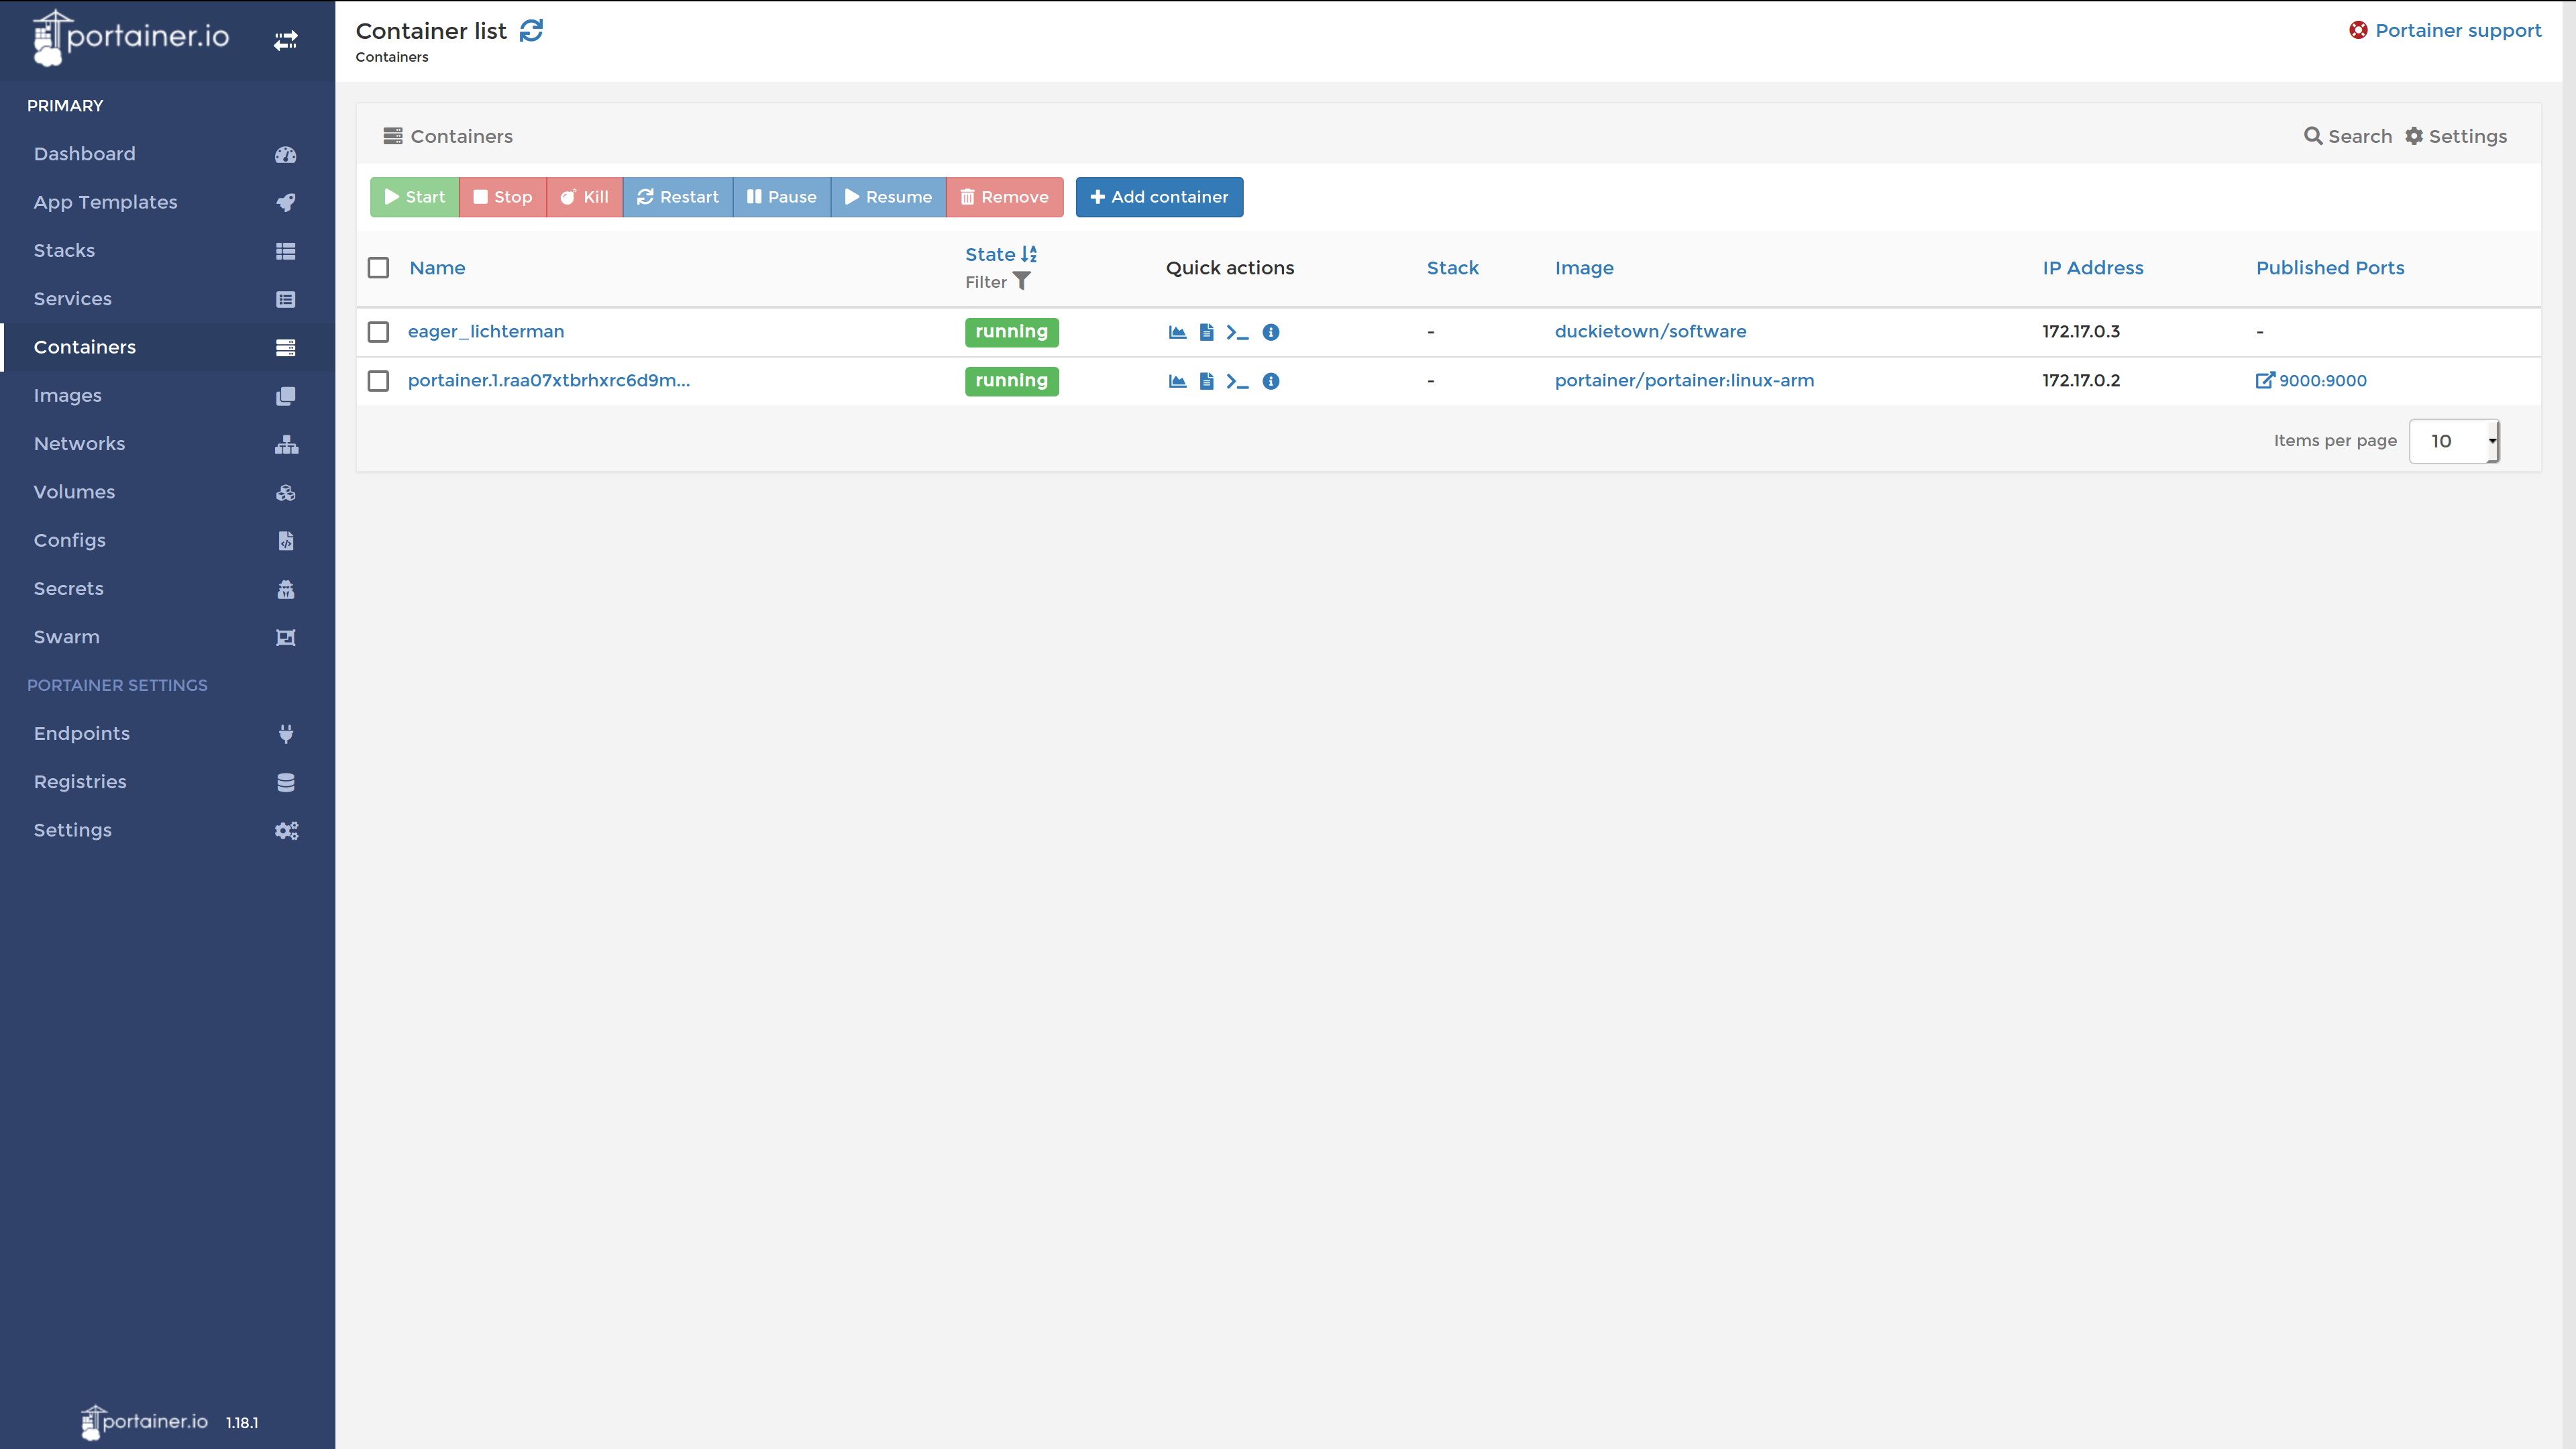
You should be greeted by the Portainer web interface. This user-friendly web interface is the primary mechanism for interacting with a Duckiebot.
From here you can see the list of running containers on your Duckiebot:

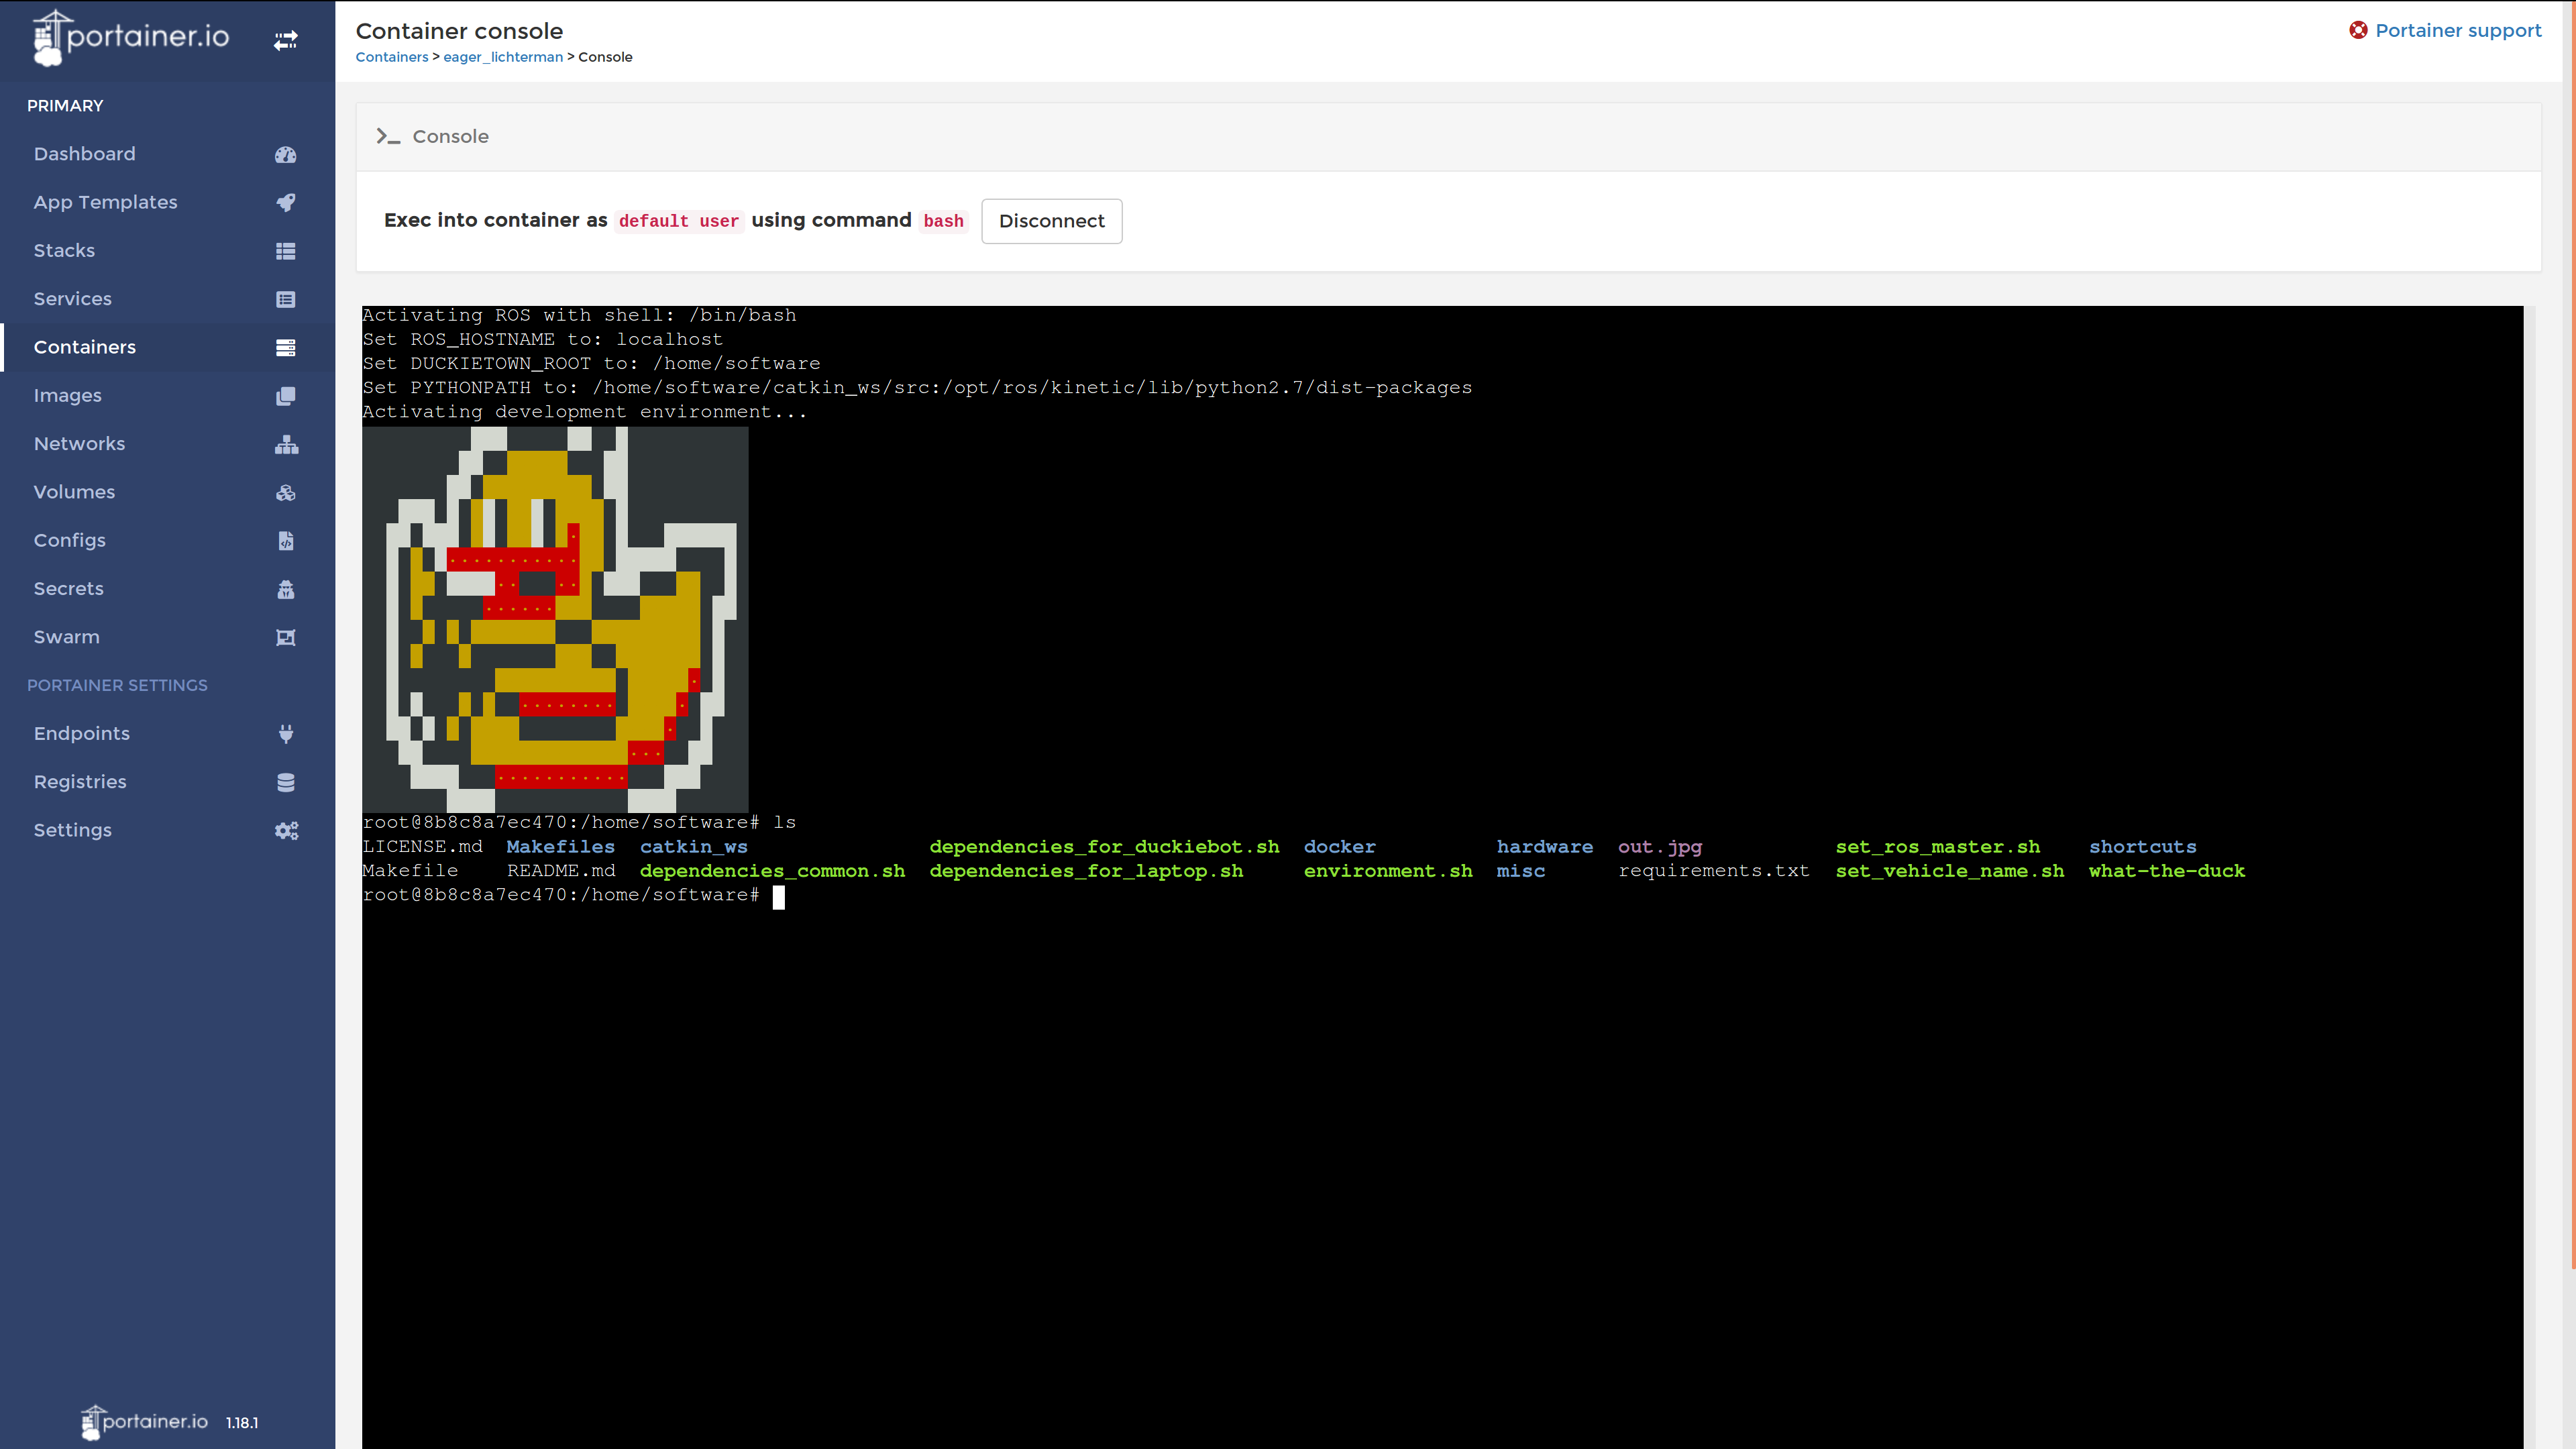
You can attach a console to a running container and interact with it via the browser:

If you prefer to use the command line, you can also connect to the Duckiebot via secure shell:
$ ssh USER_NAME@DUCKIEBOT_NAME.local
Any Docker command can also be run remotely by using the hostname flag, -H DUCKIEBOT_NAME. You should not need to open an SSH connection simply to run a Docker command.
Running Simple HTTP File Server
✎Modified 2019-09-22 by Andrea Censi
All persistent data is stored under /data on the Duckiebot SD card. To access the data via the web browser, run:
$ docker -H DUCKEBOT_NAME.local run -d \
  --name file-server \
  -v /data:/data \
  -p 8082:8082 \
  duckietown/rpi-simple-server:master18
Go to the following URL: http://DUCKIEBOT_NAME.local:8082/
Testing the camera
✎Modified 2019-09-22 by Andrea Censi
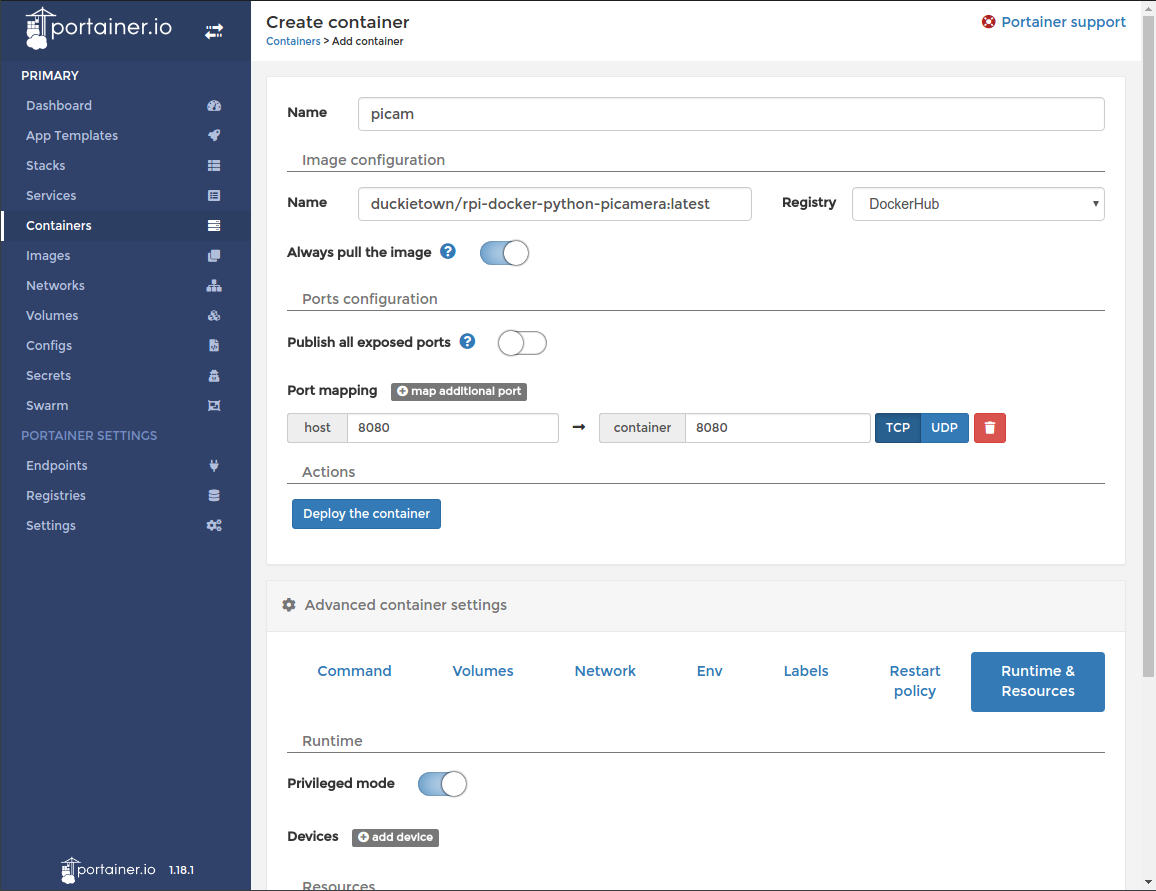
Open Portainer Web interface and run the duckietown/rpi-docker-python-picamera container.
Publish port 8081 and ensure that the container is run in “Privileged” mode.

$ docker -H DUCKIEBOT_NAME.local run -d \
  --name picam \
  -v /data:/data \
  --privileged \
  -p 8081:8081 \
  duckietown/rpi-docker-python-picamera:master18
The syntax -H DUCKIEBOT_NAME.local may be omitted if you are running the command over SSH.
Visit the following URL: http://DUCKIEBOT_NAME.local:8082/image.jpg.
Testing ROS
✎Modified 2019-09-22 by Andrea Censi
It is best to first pull the base Duckietown Docker image using the following command:
$ docker -H DUCKIEBOT_NAME.local pull duckietown/rpi-ros-kinetic-roscore:master18
Run the base Duckietown Docker image, opening a shell:
$ docker -H DUCKIEBOT_NAME.local run -it \
  --name roscore \
  --privileged \
  --net host \
  duckietown/rpi-ros-kinetic-roscore:master18
You can start a ROS environment on your laptop, which connects to the Duckiebot ROS Master:
$ nvidia-docker run -it --rm \
  --name ros \
  --net host \
  --env ROS_HOSTNAME=$HOSTNAME \
  --env ROS_MASTER_URI=http://DUCKIEBOT_IP:11311 \
  --env ROS_IP=LAPTOP_IP \
  --env="DISPLAY" \
  --env="QT_X11_NO_MITSHM=1" \
  --volume="/tmp/.X11-unix:/tmp/.X11-unix:rw"\
  rosindustrial/ros-robot-nvidia:kinetic
To allow incoming X connections, run xhost + on your computer.
There is a more secure way to do this, if you are concerned about receiving arbitrary X11 connections.
The above command opens a “ROS” shell running on your laptop that is set to connect to DUCKIEBOT‘s ROS Master.
To test the ROS connection, run roswtf:
$ roswtf
Test ROS Joystick
✎Modified 2019-09-22 by Andrea Censi
$ docker -H DUCKIEBOT.local run -d \
    --name joystick-demo \
    --privileged \
    -v /data:/data \
    --net host \
    duckietown/rpi-duckiebot-joystick-demo:master18
Calibration
✎Modified 2019-09-22 by Andrea Censi
As described in (unknown ref opmanual_duckiebot/camera-calib), print the calibration pattern and place the Duckiebot in the proper position.
Extrinsic calibration procedure
✎Modified 2019-09-22 by Andrea Censi
Launch the calibration container and follow the prompts:
$ docker -H DUCKIEBOT_NAME.local run -it \
  --name calibration \
  --privileged \
  -v /data:/data \
  --net host \
  duckietown/rpi-duckiebot-calibration:master18
You will first be asked to place the Duckiebot on the calibration pattern. Then you will be asked to place in a lane to test the calibration.
Passing -v /data:/data is necessary so that all calibration settings will be preserved.
You can run/launch the rpi-simple-server to see the results in your web browser; you can also download all files from /data. This is an easy way to view and download all calibration files and validation results.
Lane Following Demo
✎Modified 2019-09-22 by Andrea Censi
After the Duckiebot has been calibrated, you can now launch the Lane Following Demo (unknown ref opmanual_duckiebot/demo-lane-following).
$ docker -H DUCKIEBOT_NAME.local run -it \
  --name lanefollowing-demo \
  --privileged \
  -v /data:/data \
  --net host \
  duckietown/rpi-duckiebot-lanefollowing-demo:master18
Wait for a few minutes for all nodes to be started and initialized.
You can test the Duckiebot by using the Joystick. Pressing R1 starts autonomous mode.
Pressing L1 puts the Duckiebot back in manual mode.
Development workflow
✎Modified 2019-09-22 by Andrea Censi
When developing Docker containers, there are two paths to deployment. You can write the Dockerfile on your laptop or an x86 machine, then build with the RUN [ "cross-build-start" ] and RUN [ "cross-build-end" ] commands. Once tested, you can deploy to the Duckiebot directly by running the following command:
laptop $ docker save TAG_NAME | ssh -C duckie@DUCKIEBOT_NAME.local docker load
Alternately, you can build directly on an ARM device by creating a file named Dockerfile.arm (the .arm extension is just for the reader’s benefit), adding a base image and some build instructions, and running the command:
duckiebot $ docker build --file=[FILE PATH]/Dockerfile.arm --tag [TAG NAME] . # Where `.` is the build context path
Note that ARM-specific Dockerfiles will not build on non-Mac x86 machines, and attempting to build one will cause an error on Docker Hub. However, once you have debugged the Dockerfile on an ARM device, you can easily port the entire build to x86 by enclosing it with RUN [ "cross-build-start" ] and RUN [ "cross-build-end" ] instructions, after the FROM and before the CMD directive, as seen here. Don’t forget to publish to GitHub and set up a Docker Hub automatic rebuilds if you wish to automate the build.
Emulation
✎Modified 2019-09-22 by Andrea Censi
All Duckietown Docker images contain an emulator called QEMU - this allows us to run ARM images on x86 directly. To run a pure compute ROS node (i.e. one that does not require any camera or motor access) on a non-Mac x86 platform, you will need to provide a custom entrypoint to Docker when running the image. To do so, use the command docker run ... --entrypoint=qemu3-arm-static YOUR_IMAGE [RUN_COMMAND], where RUN_COMMAND may be a shell such as /bin/bash or another command such as /bin/bash -c "roscore". The qemu3-arm-static entrypoint is provided by duckietown/rpi-ros-kinetic-base, and may be upated in the future.
Common mistakes
✎Modified 2019-09-22 by Andrea Censi
exec user process caused “exec format error”
✎Modified 2019-09-22 by Andrea Censi
If you encounter this error, this means the container you are attempting to run is based on an image that is incompatible with the host’s architecture. If you are trying to run an ARM image on an x86 host, you will need to use QEMU to emulate the ARM processor architecture. To run QEMU in Duckietown or Resin derived Docker image, use the flag --entrypoint=qemu-arm-static in your Docker run command. There is currently no solution for running x86 images on an ARM host, so you will need to build ARM-specific images for the Raspberry Pi.
Resources and References
✎Modified 2019-09-22 by Andrea Censi
SD Card Configuration and Flashing script
✎Modified 2019-09-22 by Andrea Censi
- https://github.com/duckietown/scripts
- https://github.com/duckietown/scripts/blob/master/docs/DuckieOS1-RPI3Bp.sh
RPi Camera Test container
✎Modified 2019-09-22 by Andrea Censi
- https://github.com/rusi/rpi-docker-python-picamera
- https://hub.docker.com/r/duckietown/rpi-docker-python-picamera/
RPi Simple HTTP File Server
✎Modified 2019-09-22 by Andrea Censi
- https://github.com/rusi/rpi-simple-server
- https://hub.docker.com/r/duckietown/rpi-simple-server/
Duckiebot ROS containers
✎Modified 2019-09-22 by Andrea Censi
The following containers are very useful for getting started.
Base ROS container; opens bash when launched
✎
Modified 2019-09-22 by Andrea Censi
- https://github.com/duckietown/rpi-ros-kinetic-base
- https://hub.docker.com/r/duckietown/rpi-ros-kinetic-base
Base ROS container with development tools and Duckietown dependencies (includes picamera)
✎
Modified 2019-09-22 by Andrea Censi
- https://hub.docker.com/r/duckietown/rpi-ros-kinetic-dev
roscore container - starts roscore when launched
✎
Modified 2019-09-22 by Andrea Censi
- https://github.com/duckietown/rpi-ros-kinetic-roscore
- https://hub.docker.com/r/duckietown/rpi-ros-kinetic-roscore
Duckietown Base (monolithic) software container - opens bash when launched
✎
Modified 2019-09-22 by Andrea Censi
- https://github.com/duckietown/Software
- https://hub.docker.com/r/duckietown/rpi-duckiebot-base
Joystick Demo container
✎Modified 2019-09-22 by Andrea Censi
- https://github.com/duckietown/rpi-duckiebot-joystick-demo
- https://hub.docker.com/r/duckietown/rpi-duckiebot-joystick-demo
Calibration container
✎Modified 2019-09-22 by Andrea Censi
- https://github.com/duckietown/rpi-duckiebot-calibration
- https://hub.docker.com/r/duckietown/rpi-duckiebot-calibration
Lane Following Demo container
✎Modified 2019-09-22 by Andrea Censi
- https://github.com/duckietown/rpi-duckiebot-lanefollowing-demo
- https://hub.docker.com/r/duckietown/rpi-duckiebot-lanefollowing-demo
Desktop ROS containers
✎Modified 2019-09-22 by Andrea Censi
rosindustrial/ros-robot-nvidia:kinetic
- https://github.com/ros-industrial/docker
- https://hub.docker.com/r/rosindustrial/ros-robot-nvidia/
osrf/ros:kinetic-desktop-full
- https://github.com/osrf/docker_images/blob/master/ros/kinetic/ubuntu/xenial/desktop-full/
- https://hub.docker.com/r/osrf/ros/
Docker Image Hierarchy
✎Modified 2019-09-22 by Andrea Censi
Misc
✎Modified 2019-09-22 by Andrea Censi
Building images:
✎Modified 2019-09-22 by Andrea Censi
$ cd image-builder-rpi
$ docker build . --tag TAG_NAME
Transferring Docker containers
✎Modified 2019-09-22 by Andrea Censi
$ docker save TAG_NAME | gzip | ssh -C duckie@DUCKIEBOT_NAME.local docker load

rqt_dep joystick (compilation dependencies)
rqt_graph joystick (runtime dependencies)