How to Use Multimeters
✎Modified 2019-09-05 by nkumar15-brown-university
During this step you will learn about how to use multimeters to do a continuity check and a voltage check.
A multimeter or a multitester, also known as a VOM (volt-ohm-milliammeter), is an electronic measuring instrument that combines several measurement functions in one unit. A typical multimeter can measure voltage, current, and resistance. This is a general tutorial for multimeters.
NOTE: Please turn off the multimeter by setting the dial to OFF after you finish your check.

Continuity Check
✎Modified 2019-09-20 by nkumar15-brown-university
In electronics, a continuity check is a test of the resistance between any two points of a circuit (that it is in fact a complete circuit). If there is zero resistance between two points, then there is a short between the points. Shorts are potentially dangereous because they may cause far too much current to flow throughout the circuit - thus resulting in the circuit frying due to heat generated by friction.
Performing a continuity check is a safe way to debug if a circuit has an undesired short because the check does not require a power source to be connected to the circuit.
-
Select the Continuity Function
-
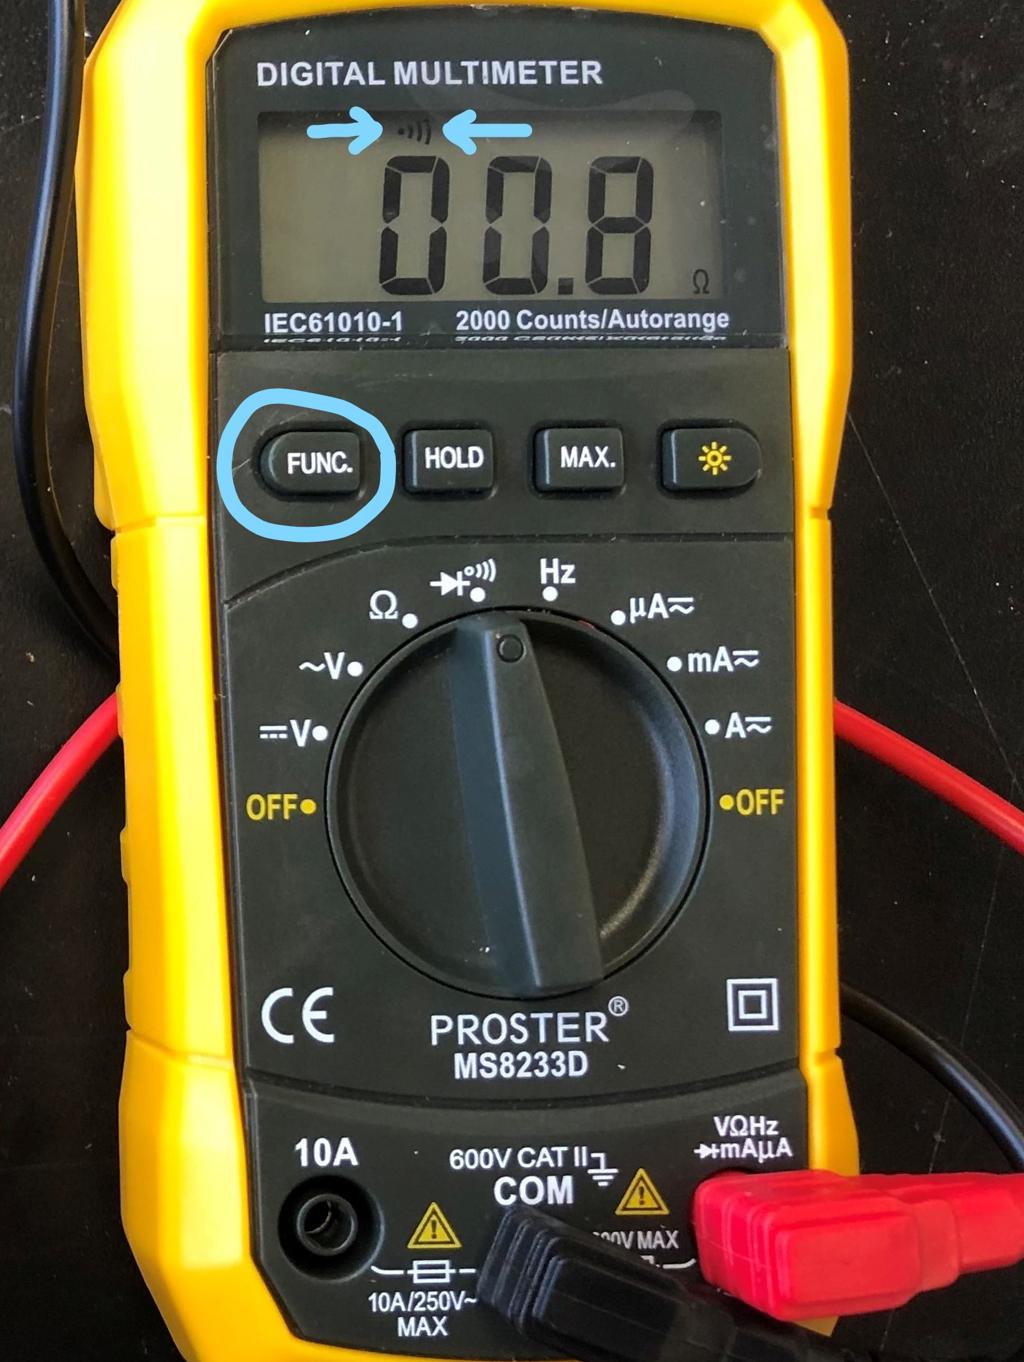
Turn the multimeter dial to the continuity test position. Then press the “FUNC.” button to switch to the continuity test mode (indicated by an icon that looks like a sound wave).
Continuity test dial position Continuity test mode 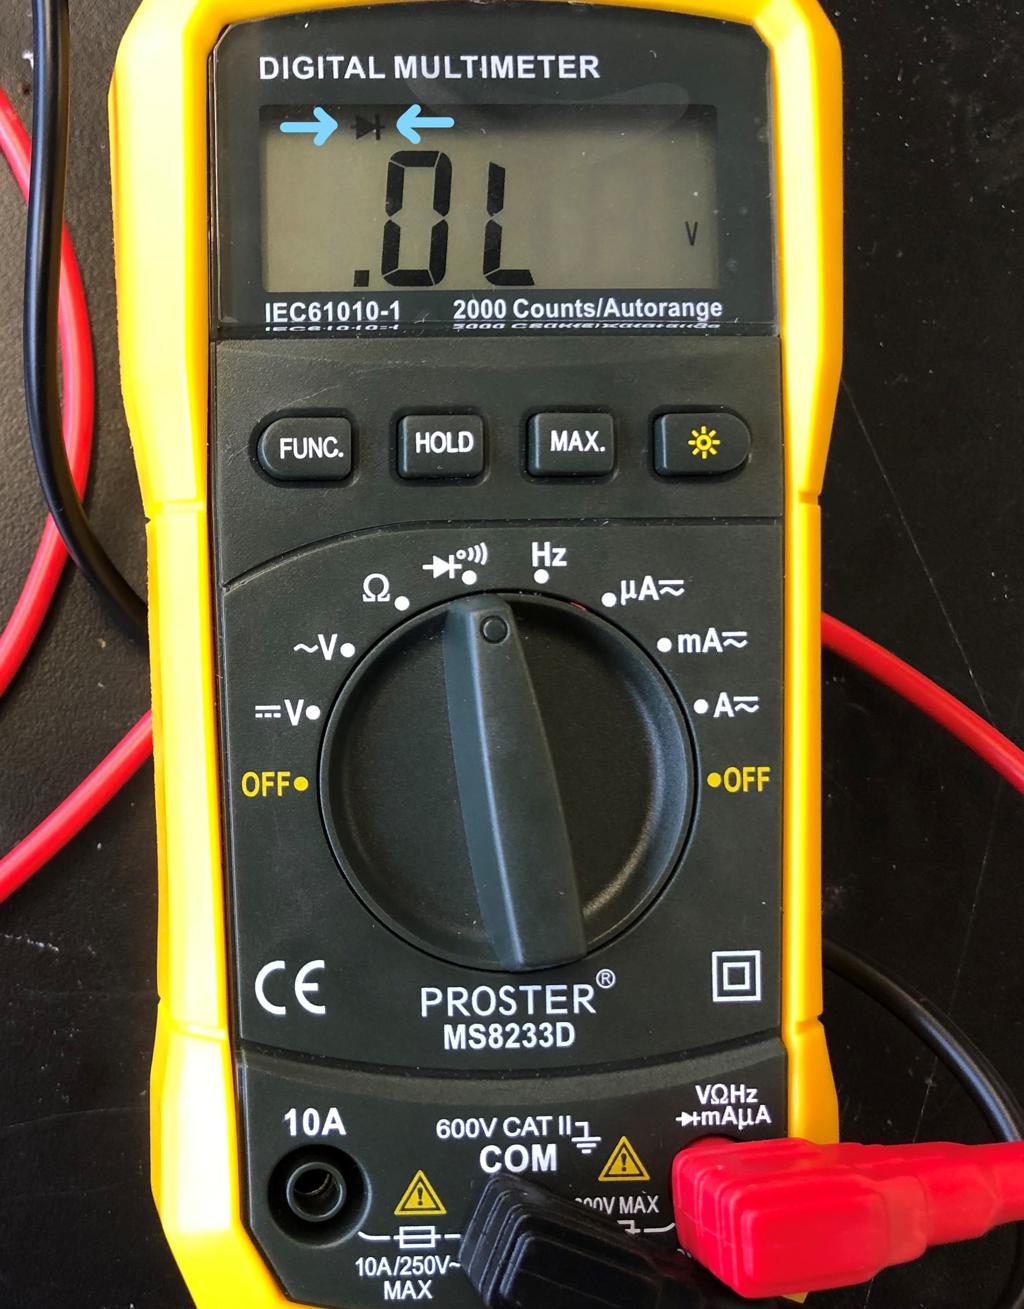
-
Test the continuity test mode by touching and holding the multimeter leads together. A continuous beep will be audible for as long as the leads are held together.
Leads held together (a continuous beep is audible) 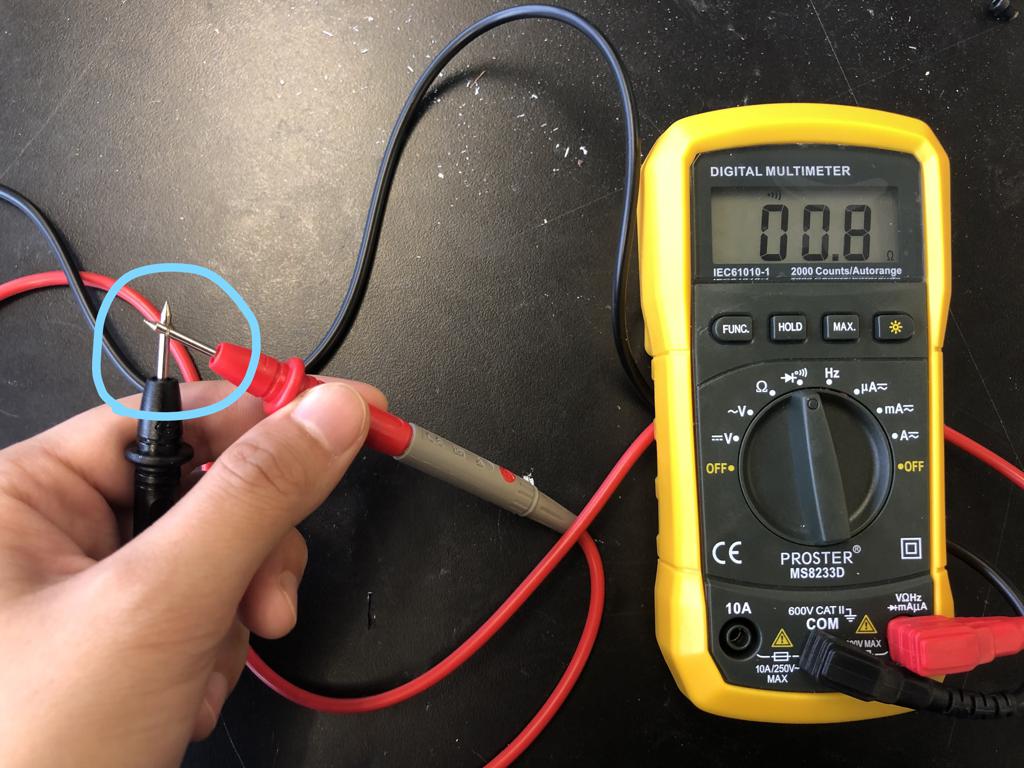
-
-
Perform the Continuity Check
-
Place each lead at a point of the circuit or component you want to test.
Multimeter leads on breadboard 
-
If the path between the two points is continuous (i.e. is a short), then the screen will display a value of zero (or near zero) and the multimeter will emit a continuous beep for as long as the leads are held in place. Note: if you hear a short beep followed by silence while the leads are held in place, then you can safely ignore the short beep.
-
General Continuity Check Strategy:
-
Check every two positive (+) terminals to make sure every pair of these terminals is continuous.
-
Check every two negative (-) terminals to make sure every pair of these terminals is continuous.
-
Check every positive terminal (+) to make sure it is not continuous with any negative terminal (-).
DC Voltage Check
✎Modified 2019-09-20 by nkumar15-brown-university
- Selecting the DC Voltage Mode
-
Switch on your multimeter, and set the dial to DC voltage mode (indicated by a V with a straight line, or the symbol ⎓).

Switch the Dial to the DC Voltage Test Function -
Performing the Voltage Check
- Place the positive (i.e. red) lead on a positive (+) terminal, and the negative (i.e. black) lead on the negative (-) terminal.
- See the screen for a voltage measurement.
- NOTE: Reversing the leads (i.e. red on - and black on +) won’t do any harm; it will simply give a negative reading of the same magnitude.
AC Voltage Check
✎Modified 2019-09-04 by andrewkpeterson
- Selecting the AC Voltage Mode
- Switch on your multimeter, and set the dial to AC voltage mode (indicated by a V with a wavy line, or the symbol ṽ).
- NOTE: AC voltage does not have polarity.
-
NOTE: Do not let your fingers touch the lead tips. Do not allow the tips to contact one another.

Switch the Dial to the AC Voltage Test Function -
Performing the Voltage Check
- Place the positive(red) lead on the positive terminal, and the negative(black) lead on the negative terminal.
- We can get a reading from the screen now.
- NOTE: Reversing the leads won’t do any harm; it just gives us a negative reading.
This contains more detailed information about AC voltage test.