$$\newcommand{\vmath}[1]{\mathsf{#1}}
\newcommand{\mapsfrom}{\leftarrow\!\shortmid}
\newcommand{\maps}{\mapsto}
\newcommand{\exc}{\vmath{\colF{exec}}}
\newcommand{\eval}{\vmath{\colR{eval}}}
\newcommand{\ufloor}{{\vmath{\colL floor}}}
\newcommand{\uceil}{{\vmath{\colU ceil}}}
\newcommand{\triv}{\text{Triv}}
\newcommand{\idFunc}{\mathrm{Id}}
\newcommand{\reals}{\mathbb{R}}
\newcommand{\One}{\mathbf{1}}
\renewcommand{\mathbbm}[1]{\mathbb{#1}}
\renewcommand{\mathscr}[1]{\mathcal{#1}}
\newcommand{\varocircle}{⦾}
\newcommand{\varotimes}{⊗}
\newcommand{\varovee}{(\vee)}
\newcommand{\colR}{\color{darkred}}
\newcommand{\colF}{\color{darkgreen}}
\newcommand{\colH}{\color{blue}}
\newcommand{\colI}{\color{orange}}
\newcommand{\rtof}{{\colH{\varphi}}}
\newcommand{\ftor}{{\colH{h}}}
\newcommand{\ftoR}{{\colH{H}}}
\newcommand{\Rcomp}{{\mathbb{R}}^{*}_{\small+}}
\newcommand{\nonNegRealsComp}{\Rcomp}
\newcommand{\nonNegReals}{\mathbb{R}_+}
\newcommand{\Rcpu}[1]{\Rcomp{}[\textrm{#1}]}
\newcommand{\funsp}{{\colF{\mathscr{F}}}}
\newcommand{\impsp}{{\colI{\mathscr{I}}}}
\newcommand{\ressp}{{\colR{\mathscr{R}}}}
\newcommand{\funleq}{\posleq_{\funsp}}
\newcommand{\fun}{\vmath{\colF{f}}}
\newcommand{\res}{\vmath{\colR{r}}}
\newcommand{\funtop}{\top_\funsp}
\newcommand{\funbot}{\bot_\funsp}
\newcommand{\imp}{\vmath{i}}
\newcommand{\paramsp}{\mathscr{P}}
\newcommand{\resleq}{\posleq_{\ressp}}
\newcommand{\restop}{\top_\ressp}
\newcommand{\resbot}{\bot_\ressp}
\newcommand{\resspleq}{\resleq}
\newcommand{\tressp}{\trof(\ressp)}
\newcommand{\trof}{\mathscr{T}}
\newcommand{\tres}{T}
\newcommand{\tresleq}{\leq_{\trof}}
\newcommand{\trleq}{\leq_{\trof}}
\newcommand{\dpisp}{\ensuremath{\vmath{DPI}}}
\newcommand{\cdpisp}{\ensuremath{\vmath{CDPI}}}
\newcommand{\dprobsp}{\ensuremath{\vmath{DP}}}
\newcommand{\dprob}{\vmath{dp}}
\newcommand{\dpseries}{\vmath{series}}
\newcommand{\dppar}{\vmath{par}}
\newcommand{\dploop}{\vmath{loop}}
\newcommand{\dploopb}{\vmath{loopb}}
\newcommand{\cdprobsp}{\ensuremath{\vmath{CDP}}}
\newcommand{\cdprob}{\vmath{cdp}}
\newcommand{\dpatoms}{\vmath{atoms}}
\newcommand{\resMin}{{\Min_{\resleq}}}
\newcommand{\unconnectedfun}{\mathsf{UF}}
\newcommand{\unconnectedres}{\mathsf{UR}}
\newcommand{\Aressp}{{\mathsf{\colR A}\colR\ressp}}
\newcommand{\Afunsp}{{\mathsf{\colF A}\colF\funsp}}
\newcommand{\udpa}{\boldsymbol{u}_a}
\newcommand{\udpb}{\boldsymbol{u}_b}
\newcommand{\udpL}{\boldsymbol{\mathsf{L}}}
\newcommand{\udpU}{\boldsymbol{\mathsf{U}}}
\newcommand{\udpsp}{\vmath{UDP}}
\newcommand{\udpleq}{\posleq_\udpsp}
\newcommand{\dpsp}{\vmath{DP}}
\newcommand{\dpleq}{\posleq_\dpsp}
\newcommand{\terms}{\vmath{Terms}}
\newcommand{\udpsem}{\Phi}
\newcommand{\dpsem}{\varphi}
\newcommand{\atoms}{\mathcal{A}}
\newcommand{\atree}{\boldsymbol{\vmath{T}}}
\newcommand{\val}{\boldsymbol{v}}
\newcommand{\ops}{\vmath{ops}}
\newcommand{\ftorL}{\ftor_L}
\newcommand{\ftorU}{\ftor_U}
\newcommand{\acprod}{\mathbin{\boldsymbol{\times}}}
\newcommand{\oploop}{\dagger}
\newcommand{\opseries}{\mathbin{\varocircle}}
\newcommand{\oppar}{\mathbin{\varotimes}}
\newcommand{\opcoprod}{\mathbin{\varovee}}
\newcommand{\UId}{\vmath{UId}}
\newcommand{\vdc}{\vmath{vdc}}
\newcommand{\makedp}{\Gamma}
\newcommand{\colU}{\color{purple}}
\newcommand{\colL}{\color{orange}}
\newcommand{\R}[1]{{\colR{#1}}}
\newcommand{\F}[1]{{\colF{#1}}}
\newcommand{\I}[1]{{\colI{#1}}}
\newcommand{\cdpiN}{\mathcal{V}}
\newcommand{\cdpin}{v}
\newcommand{\cdpinA}{v_1}
\newcommand{\cdpinB}{v_2}
\newcommand{\cdpiresind}{i}
\newcommand{\cdpifunind}{j}
\newcommand{\cdpiresindA}{i_1}
\newcommand{\cdpifunindB}{j_2}
\newcommand{\dpinumf}{\vmath{nf}}
\newcommand{\dpinumr}{\vmath{nr}}
\newcommand{\cdpinnumf}{\dpinumf_\cdpin}
\newcommand{\cdpinnumr}{\dpinumr_\cdpin}
\newcommand{\cdpiE}{\mathcal{E}}
\newcommand{\subto}{\text{s.t.}}
\newcommand{\with}{\text{using}}
\newcommand{\pset}{\mathscr{P}}
\DeclareMathOperator*{\Min}{Min}
\DeclareMathOperator*{\Inf}{Inf}
\DeclareMathOperator*{\Sup}{Sup}
\DeclareMathOperator*{\Max}{Max}
\newcommand{\lowerbounds}{\vmath{lowerbounds}}
\newcommand{\upperbounds}{\vmath{upperbounds}}
\newcommand{\posMin}{\Min}
\newcommand{\posleq}{\preceq}
\newcommand{\poslt}{\prec}
\newcommand{\posgeq}{\succeq}
\newcommand{\posA}{\mathcal{P}}
\newcommand{\posAleq}{\mathrel{{\posleq_\posA}}}
\newcommand{\posAMin}{\mathop{{\posMin_{\posAleq}}}}
\newcommand{\posAmin}{\mathop{{\min_{\posAleq}}}}
\newcommand{\posAmax}{\mathop{{\max_{\posAleq}}}}
\newcommand{\posB}{\mathcal{Q}}
\newcommand{\posBleq}{\mathrel{{\posleq_\posB}}}
\newcommand{\posC}{\mathcal{R}}
\newcommand{\lfp}{\vmath{lfp}}
\newcommand{\prefixed}{\vmath{prefixed}}
\newcommand{\CPOs}{\textsc{CPO}s\xspace}
\newcommand{\CPO}{\textsc{CPO}\xspace}
\newcommand{\DCPOs}{\textsc{DCPO}s\xspace}
\newcommand{\DCPO}{\textsc{DCPO}\xspace}
\newcommand{\antichains}{\vmath{A}}
\newcommand{\upsets}{\vmath{U}}
\newcommand{\downsets}{\vmath{D}}
\newcommand{\upresleq}{\posleq_{\upressp}}
\newcommand{\upressp}{\upsets\ressp}
\newcommand{\allupsets}{\vmath{Up}}
\newcommand{\upit}{{\uparrow\,}}
\newcommand{\stupit}{\dot{\upit}}
\newcommand{\posetwidth}{\vmath{width}}
\newcommand{\posetheight}{\vmath{height}}
\newcommand{\posdef}[1]{\mathcal{P}_{#1}}
\newcommand{\MR}{\M{R}}
\newcommand{\myacronym}[1]{\textsc{#1}\xspace}
\newcommand{\T}[1]{\boldsymbol{{\mathsf{#1}}}}
\newcommand{\Tel}[1]{{\mathsf{#1}}}
\newcommand{\Te}[1]{\Tel{#1}}
\newcommand{\M}[1]{\mathbf{#1}}
\newcommand{\Mel}[1]{\mathrm{#1}}
\newcommand{\aset}[1]{\mathscr{#1}}
\newcommand{\agroup}[1]{\mathrm{#1}}
\newcommand{\aseq}[1]{\boldsymbol{#1}}
\newcommand{\aseqe}[1]{#1}
\newcommand{\dummyIndices}{}
\newcommand{\aword}[1]{\mathsf{#1}}
\newcommand{\vmath}[1]{\aword{#1}}
\newcommand{\codefunc}[1]{\texttt{#1}\xspace}
\newcommand{\swpackage}[1]{\textsc{#1}\xspace}
\newcommand{\MA}{\M{A}}
\newcommand{\MB}{\M{B}}
\newcommand{\MC}{\M{C}}
\newcommand{\MG}{\M{G}}
\newcommand{\MH}{\M{H}}
\newcommand{\ML}{\M{L}}
\newcommand{\MQ}{\M{Q}}
\newcommand{\MP}{\M{P}}
\newcommand{\MS}{\M{S}}
\newcommand{\MSigma}{\M{\Sigma}}
\newcommand{\MV}{\M{V}}
\newcommand{\MW}{\M{W}}
\newcommand{\SP}{P_{\text{s}}}
\newcommand{\AP}{P_{\text{a}}}
\newcommand{\SE}{E}
\newcommand{\ER}{r}
\newcommand{\HP}{\Theta}
\newcommand{\np}{n}
\newcommand{\ones}{\boldsymbol{1}}
\newcommand{\idMat}{\M{I}}
\newcommand{\matTrace}{\vmath{Tr}}
\newcommand{\angleFun}{\angle}
\newcommand{\flatten}{\mathsf{vec}}
\newcommand{\batterymass}{{\colR{m}}}
\newcommand{\batterycapacity}{{\colF{C}}}
\newcommand{\batterycost}{{\colR{c}}}
\newcommand{\specificenergy}{{\colR{\rho}}}
\newcommand{\specificcost}{{\colR{\alpha}}}
\newcommand{\D}{\,\textrm{d}}
\newcommand{\ex}{\mathbb{E}}
\newcommand{\aset}[1]{\mathcal{#1}}
\newcommand{\amat}[1]{\mathbf{#1}}
\newcommand{\avec}[1]{\mathbf{#1}}
\newcommand{\rv}[1]{\boldsymbol{#1}}
\newcommand{\definedas}{\triangleq}
\newcommand{\nats}{\mathbb{N}}
\newcommand{\ints}{\mathbb{Z}}
\newcommand{\rats}{\mathbb{Q}}
\newcommand{\reals}{\mathbb{R}}
\newcommand{\comp}{\mathbb{C}}
\newcommand{\Time}{\mathbb{T}}
\newcommand{\SEthree}{\text{SE}(3)}
\newcommand{\SEtwo}{\text{SE}(2)}
\newcommand{\sethree}{\text{se}(3)}
\newcommand{\setwo}{\text{se}(2)}
\newcommand{\SOthree}{\text{SO}(3)}
\newcommand{\pose}{\boldsymbol{q}}
\newcommand{\state}{\boldsymbol{x}}
\newcommand{\statesp}{\mathcal{X}}
\newcommand{\bmu}{\boldsymbol{\mu}}
\newcommand{\bSigma}{\boldsymbol{\Sigma}}
\newcommand{\tup}[1]{\langle#1\rangle}$$
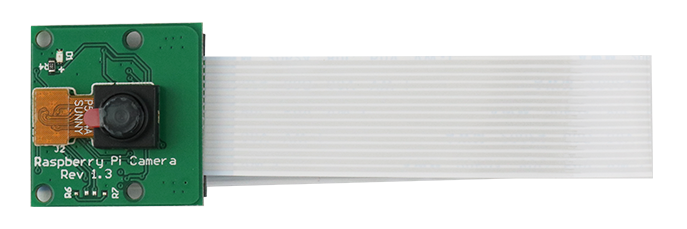
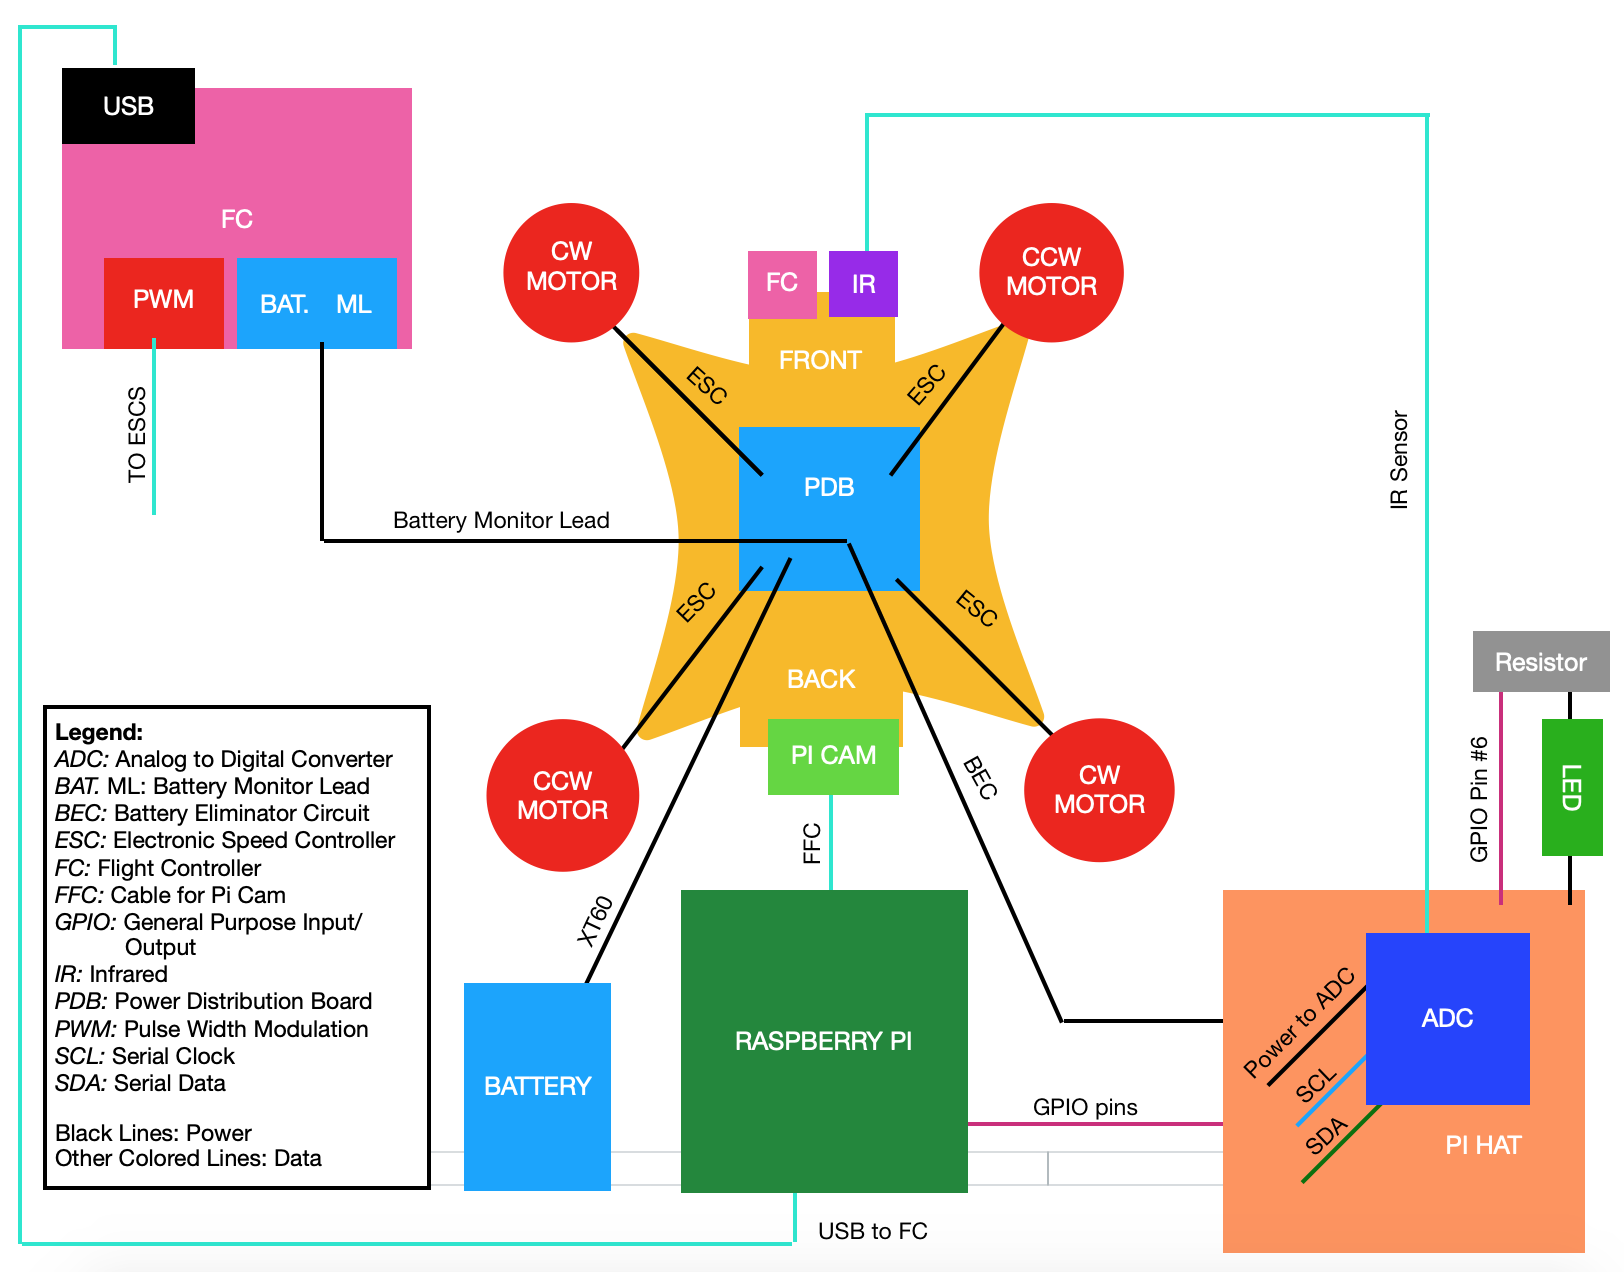
Part 4: Camera, Propellers, and Mounting Hardware Overview
✎