Calibration - Camera
✎Modified 2021-03-13 by duckietown
This section describes the instrinsics and extrinsics calibration procedures.
You can see the camera image on the laptop. The procedure is documented in Unit C-11 - Operation - Make it See.
That your camera intrinsics and extrinsics are calibrated and stored on the Duckiebot.
Materials
✎Modified 2021-12-08 by Jacopo Tani
If you do not have one already, download and print a PDF of the calibration checkerboard:
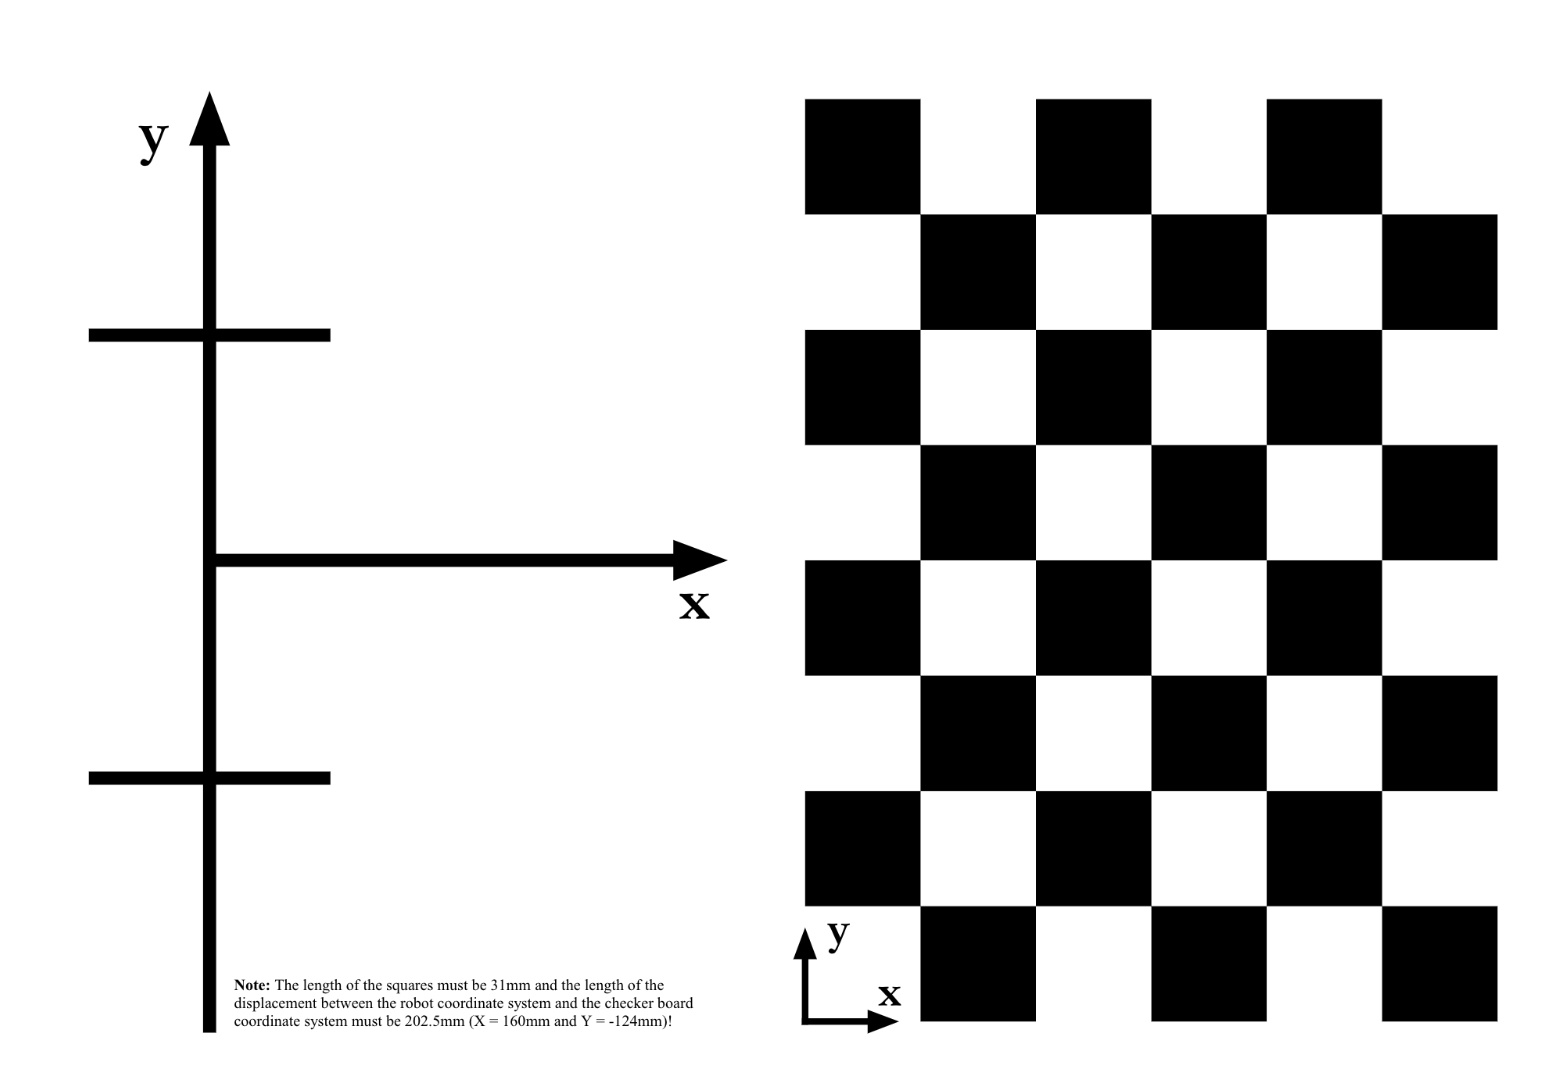
the squares must have side equal to 0.031 m = 3.1 cm. Please measure this, as having the wrong size will make your Duckiebot crash.
In case your squares are not of the right size, make sure your printer settings are on A3 format, no automatic scaling, 100% size.
Fix the checkerboard to a rigid planar surface that you can move around.
If the pattern is not rigid the calibration will be useless. You can print on thick paper or adhere to something rigid to achieve this.
Optional material
✎Modified 2021-02-17 by tanij
You will also need a “lane” during the extrinsics calibration procedure. This is not necessary.
Intrinsic Calibration
✎Modified 2019-09-25 by carmen-sc
Every camera is a little bit different so we need to do a camera calibration procedure to account for the small manufacturing discrepancies. This process will involve displaying a predetermined pattern to the camera and using it to solve for the camera parameters. For more information on the details see the slides. The procedure is basically a wrapper around the ROS camera calibration tool.
Launch the intrinsic calibration application
✎Modified 2021-03-23 by Vincenzo
Next you can launch the intrinsic calibration program with:
laptop $ dts duckiebot calibrate_intrinsics hostname
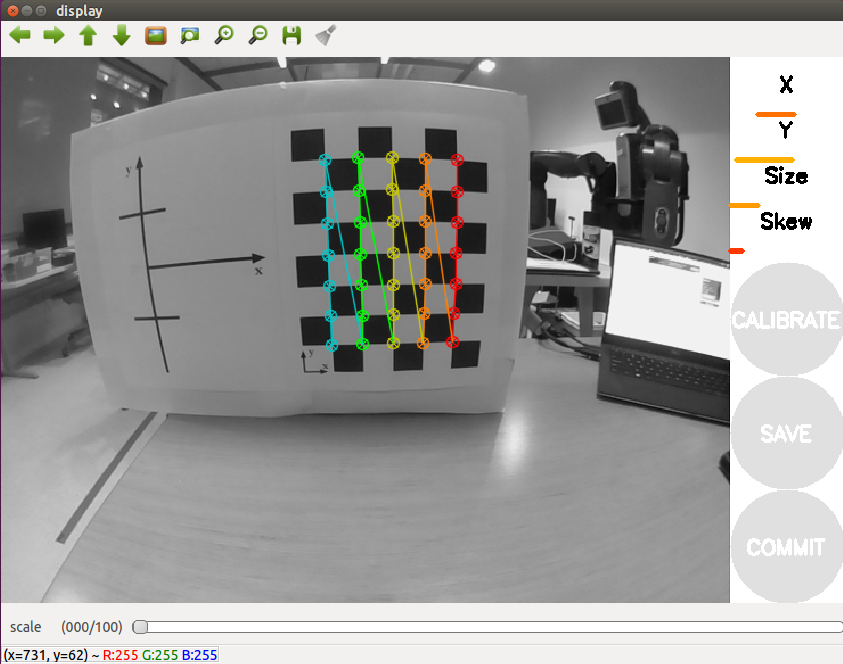
You should see a display screen open on the laptop (Figure 13.2).
If you only see a window with black screen during the startup, try to resize the window manually using cursor, and you should see the window content correctly.
Calibration dance
✎Modified 2018-09-28 by Andrea Censi
Position the checkerboard in front of the camera until you see colored lines overlaying the checkerboard. You will only see the colored lines if the entire checkerboard is within the field of view of the camera.
You should also see colored bars in the sidebar of the display window. These bars indicate the current range of the checkerboard in the camera’s field of view:
- X bar: the observed horizontal range (left - right)
- Y bar: the observed vertical range (top - bottom)
- Size bar: the observed range in the checkerboard size (forward - backward from the camera direction)
- Skew bar: the relative tilt between the checkerboard and the camera direction
Also, make sure to focus the image by rotating the mechanical focus ring on the lens of the camera.
Do not touch the focus anymore, ever, as it will invalidate calibration.
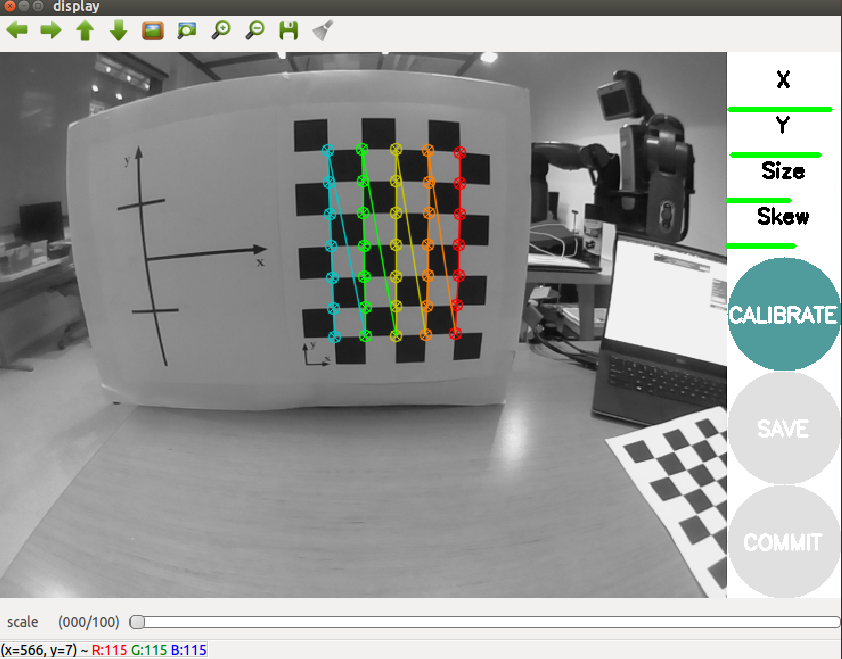
Now move the checkerboard right/left, up/down, and tilt the checkerboard through various angles of relative to the image plane. After each movement, make sure to pause long enough for the checkerboard to become highlighted. Once you have collected enough data, all four indicator bars will turn green. Press the “CALIBRATE” button in the sidebar.
Calibration may take a few moments. Note that the screen may dim. Don’t worry, the calibration is working.
Save the calibration results
✎Modified 2021-03-23 by Vincenzo
If you are satisfied with the calibration, you can save the results by pressing the “COMMIT” button in the side bar. (You never need to click the “SAVE” button.)

This will automatically save the calibration results on your Duckiebot:
/data/config/calibrations/camera_intrinsic/hostname.yaml
You can view or download the calibration file using the Dashboard running at http://hostname.local under File Manager in the sidebar on the left, navigating to config/calibrations/camera_intrinsic/hostname.yaml.
Keeping your calibration valid
✎Modified 2019-05-08 by Liam Paull
Do not change the focus during or after the calibration, otherwise your calibration is no longer valid.
Do not use the lens cover anymore; removing the lens cover may change the focus.
Extrinsic Camera Calibration
✎Modified 2021-03-20 by Vincenzo
Setup
✎Modified 2018-09-28 by Andrea Censi
Arrange the Duckiebot and checkerboard according to Figure 13.5. Note that the axis of the wheels should be aligned with the y-axis.
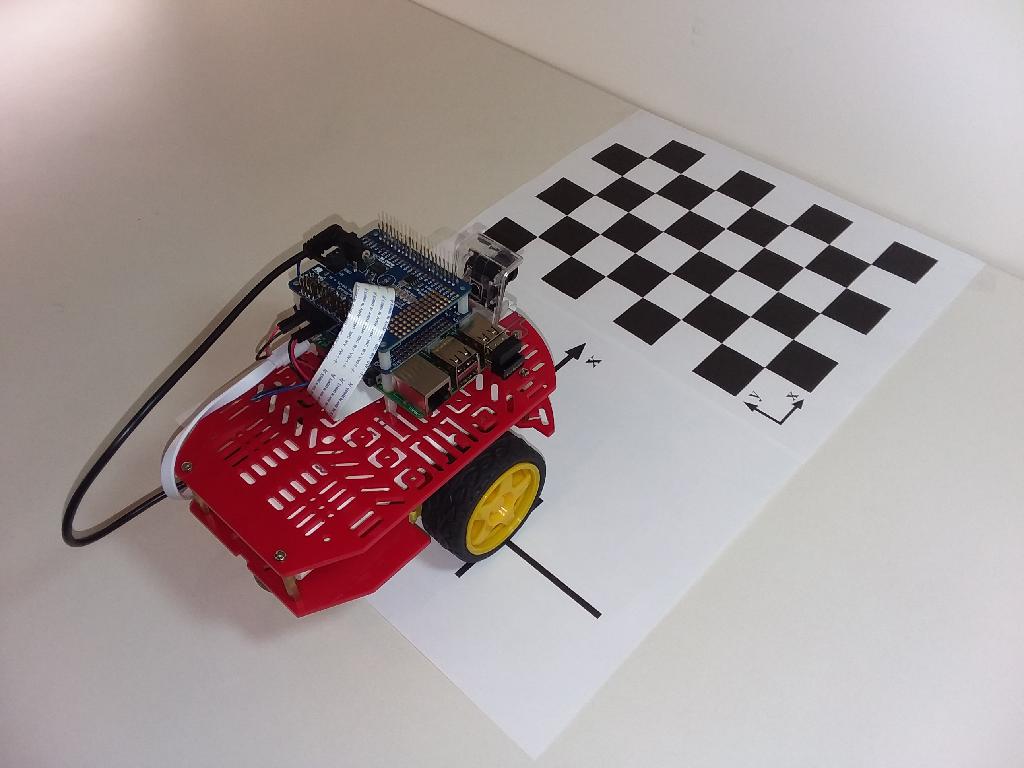
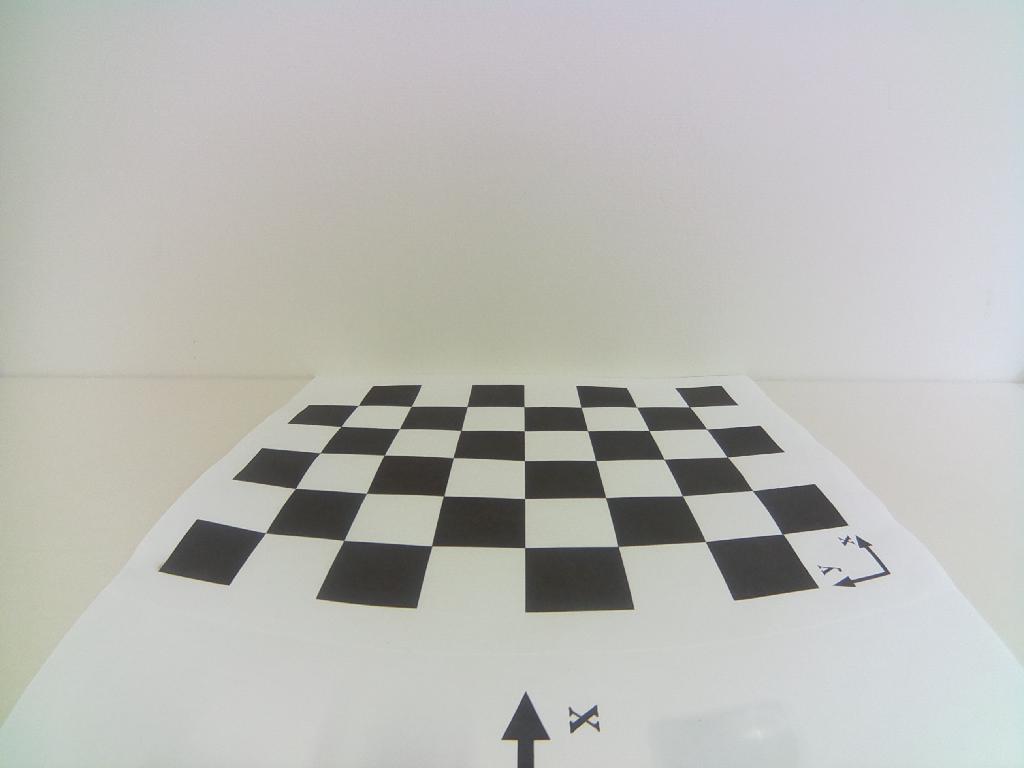
Figure 13.6 shows a view of the calibration checkerboard from the Duckiebot. To ensure proper calibration there should be no clutter in the background.
Launch the extrinsic calibration pipeline
✎Modified 2021-03-23 by Vincenzo
Run:
laptop $ dts duckiebot calibrate_extrinsics hostname
First the output will instruct you place your robot on the calibration box and press Enter. If all goes well the program will complete.
This will automatically save the calibration results on your Duckiebot:
/data/config/calibrations/camera_extrinsic/hostname.yaml
You can view or download the calibration file using the Dashboard running at http://hostname.local under File Manager in the sidebar on the left, navigating to config/calibrations/camera_extrinsic/hostname.yaml.
Troubleshooting
✎You see a long complicated error message that ends with something about findChessBoardCorners failed.
Your camera is not viewing the full checkerboard pattern. Most likely part of the chess board pattern is occluded. Possibly you didn’t assemble your Duckiebot correctly or you did not put it on the calibration pattern properly.