AMOD18 To Be Detected
✎Modified 2019-04-28 by tanij
Introduction
✎Modified 2018-12-27 by AkbarShah96
It is detrimental for the health and safety of the citizens of duckietown, that duckiebots navigate safely in the city. Therefore, the duckiebots must be able to detect and correctly identify road users (duckies and duckiebots) as well as road signals (traffic signs, traffic lights, etc.), furthermore, the apriltags(QR code) around duckietown have been used by other projects. To achieve this goal, a object detection pipeline was created based on a convolutional neural network, which detects the aforementioned objects using the monocular camera only.
A high-level overview of how the detection pipeline works can be seen in the figure below. Because the RaspBerry Pi (RPI) is by no means powerful enough to run the detection pipeline, it has to be run on a laptop.

The duckiebot runs the ros-picam container, which publishes the image stream from the duckiebot’s camera to the detector node on the laptop. The detector node then does its predictions, draws bounding boxes with the appropriate labels and confidence levels and publishes a new stream of images to another topic which can then be visualized in real time through rqt_image_view, or a similar tool. The figure below shows the rqt_graph where the ROS nodes, topics and their interaction can be visualized when the detection is being run on a stream of images coming from the camera of yanberBot.

Approach
✎Modified 2018-12-27 by AkbarShah96
In this section we will elaborate on the steps taken by the team from the start of the project (Nov 12th 2018) to the DEMO that wrapped it up on Dec 20th 2018.
Definition of objectives and contribution
✎Modified 2018-12-27 by AkbarShah96
The first thing to do at the start of any research project is to look at what has been done, identify the gaps where progress can be made and translate this notion of progress into tangible goals and milestones.
This was the first year in the history of the AMOD course that a project was assigned to object detection and pattern recognition. However, detecting objects in some shape or form was of course not new in Duckietown; perception being arguably the most important features of an autonomous robot.
Out of all past projects, the one that we could identify ourselves best with was “Saviours”. Their work focussed on obstacle avoidance rather than just detection. Therefore, one of the main requirements for their detection pipeline was speed. Hence why they opted for an approach where they would detect objects using manually extracted features (such as image and colour transforms). Speed, of course, does not come without sacrificing performance. Extracting features using heuristics can be very efficient but is incredibly hard for a large class of objects under varying lighting conditions and environment.
Our research goals were targeted at finding another solution along the “Pareto Barrier” between speed, performance and robustness. In other words, our goal was to use a deep learning approach to significantly outperform the Saviours’ detection algorithm while staying as close as possible to their speed. The results shown in the figure below show that we have indeed been able to outperform the previous detection algorithm in terms of Intersection over Union (IoU) and accuracy, while identifying 5 more object classes and being robust against cluttered environments and varying lighting conditions. Due to time constraints we have not been able to deploy our inference model on the duckiebot’s RPI, which means we do not have a side-by-side comparison for speed performance.

Building your own object detector
✎Modified 2018-12-27 by AkbarShah96
In this section, we briefly highlight the steps required to build your own object detector. A collection of images known as data set is required to train the convolutional neural network. The images were collected from the duckietown in the Auto Lab with different lighting conditions in order to train our model to be robust against lighting.
The data was labeled using an external company (thehive.ai). It is recommended to provide detailed instructions on how you want your images labeled and make good qualifier/honey pot tasks in order to make sure the labeling is done effectively. The labeled images are then used to train the convolutional neural network. The tensorflow object detection API provides an open source framework which makes it easy to deploy object detecton models.
The CNN is then optimized to provide the desired accuracy and speed. The Duckiebot has limited computational resources, therefore it is recommended to have a very light model. The inference model is then containerized using docker. The figure below shows the steps to build an object detector.

Performance Figures
✎Modified 2018-12-27 by AkbarShah96
In this section we present the performance of the two different models. The figure below shows two graphs extracted from Tensorboard after training the two object detection models. On the y-axis, the mean average precision (mAP) is plotted while on the x-axis are the number of learning steps of the CNN optimizer. To calculate mAP, a threshold of IoU=0.5 was set, meaning that an object was classified correctly with respect to the ground truth if the IoU of the bounding boxes was above 0.5 and the labels matched.The heavier model known as ‘rfcn_resnet101’ had an inference speed of 92 ms with a mean average precision of 30 percent. The second model was lighter known as ‘ssdlite_mobilenet_v2’ (only 14 MB), it had an inference speed of 27ms and a mean average precision of 22 percent. The figure below shows the mean average precision for both models. The performance was measured on Nvidia GeForce GTX TITAN X GPU.

Demo
✎Modified 2018-12-27 by AkbarShah96
This is the demo for object detection using the camera on the Duckiebot. The Duckiebot has been trained to detect duckies, Duckiebots, traffic lights, QR codes, intersection signs, stop signs, and (traffic) signal signs. The joystick demo (or lane following pipeline) is used to navigate the Duckiebot around Duckietown.
Our codebase can be found at the following repository on GitHub: https://github.com/duckietown/duckietown-objdet. This repository contains all the files needed to train the object detector and containerize the inference model that was used in the DEMO.
Initialized Duckiebots.
wheel calibration completed.Wheel Calibration
Camera calibration completed.Camera calibration
Joystick demo completed.Joystick demo
Duckietown with all classified objects.
Docker is installed on your computer.
The duckiebot is able to detect objects using its camera.
Video and Images of expected results
✎Modified 2018-12-27 by AkbarShah96

The video is at https://vimeo.com/308298528.


Duckietown setup notes
✎Modified 2018-12-27 by AkbarShah96
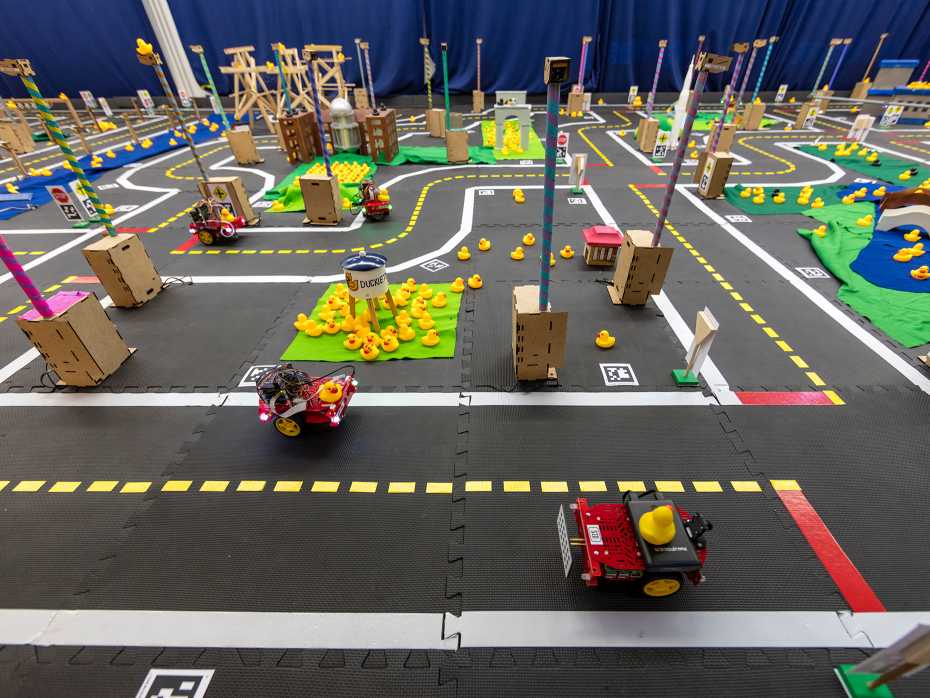
The Duckietown used for this demo must have the following characteristics.
-
Several duckies placed on the road and at the side of the road.
-
Intersection sign, Stop sign and Signal sign.
-
QR codes on the ground and below the signs mentioned above.
-
Traffic lights at intersections
-
Duckiebots on the road.
No cluttering of objects in one place. Allow enough space between each object. An example image is shown below. See image below for reference.
Duckiebot setup notes
✎Modified 2018-12-27 by AkbarShah96
No extra setup needed for the duckiebot except put a duckie on top of the duckiebot.(Seriously)
Pre-flight checklist
✎Modified 2018-12-19 by AkbarShah96
The pre-flight checklist for this demo are:
Check: Battery level is sufficient.
Check: Docker Installed.
Check: Joystick container is running.
Check: Rospicam container is running.
Check: Base container is running.
Check: Put on your smartie pants.
Demo instructions
✎Modified 2018-12-27 by AkbarShah96
The following steps must be completed in order to run the object detector on your duckiebot.
If you are lazy, here is a video guiding you through some of the steps.

The video is at https://vimeo.com/308461574.
Step 1: When the Duckiebot is powered on, make sure all the containers required are running. In your laptop, run
laptop $ docker -H duckie_bot.local ps
to check whether the right containers are running or not. You can also check by going to the portainer webpage: http://duckie_bot.local:9000/#/containers.
If the required containers are running then skip to Step 4.

Step 2 (Optional): Launch the rospicam container so that we can capture images from the camera of Duckiebot.
laptop $ docker -H duckie_bot.local run -it --name ros-picam --network host --device /dev/vchiq -v /data:/data Duckietown/rpi-Duckiebot-ros-picam:master18
This command will run a container and create a ros node inside automatically. This ros node will publish the images captured by the camera to a ros topic.
Step 3 (Optional): Launch the base container on the duckiebot.
laptop $ docker -H duckie_bot.local run -it --network host --privileged --name base duckietown/rpi-duckiebot-base:master18 /bin/bash
Step 4: Launch the object detector container.
For this command you need the Duckiebot’s IP address. In order to obtain the Duckiebot IP address, you should ping your Duckiebot in another terminal and note down the IP address of your duckiebot.
laptop $ docker run -it --name object_detection --network host -e ROS_MASTER_URI=http://duckie_bot_IPaddress:11311/ -e DUCKIEBOT_NAME=duckie_bot -e ROS_HOSTNAME=Name_Of_Your_Computer zgxsin/object_detection:1.7
Notice that we have to set up the ROS_MASTER_URI variable so that the ros nodes can communicate with each other. This command will create a object_detection ros node automatically. It will listen to the camera image topic in step 2 and predict images and send the predicted images to another topic for visualization.
You can replace the 1.7 in the above command with 1.6 to use a model with good accuracy but lower speed. There is a trade off between the two. Incase the version 1.7 is not working for you, please try version 1.6.
Step 5: In another terminal type:
laptop $ dts start_gui_tools duckie_bot
We can check whether everything is working inside this container. (See Tip 1)
After that, run the following command in the container
container $ rqt_image_view
This will pop up a new GUI window. Select the /!duckie_bot]/prediction_images topic from the drop down menu.
Step 6: Move the Duckiebot using the joystick demo to different parts of Duckietown and see the magic. The live feed is a bit slow at the moment so please give it time to update.
Troubleshooting and Tips
✎Modified 2018-12-27 by AkbarShah96
The Duckiebot is not moving.
Make sure that the joystick container is running. Note that the command for launching the joystick was changed to:
laptop $ dts duckiebot keyboard_control duckie_bot
No images recorded.
Make sure that the rospicam container is running.
The ros nodes cannot communicate with each other.
If you are using docker on Mac OSX, there seems to be an issue with the network of docker containers. We recommend to use docker on Ubuntu 16.04. We have tested it and everything is fine.
The storage in the raspberry PI has reached its limit.
Run docker -H duckie_bot.local images to whether dangling images exist and run docker -H duckie_bot.local rmi --force image_ID to remove them.
ERROR: unable to contact ROS master at [http://![Duckiebot_name].local:11311/] The traceback for the exception was written to the log file.
make sure your laptop and Duckiebot are on the same network.
docker: Error response from daemon: Conflict. The container name “/object_detection” is already in use by container.
Run the command
laptop $ docker container rm --force object_detection.
Repeat step 4.
Tip 1: We can check whether everything is working inside object detection container. Run rosnode list to check whether corresponding ros nodes are running. Run rostopic list to check whether the corresponding ros topics exist. You can run other ros-related command to do the check as well.
Tip 2: It is very important that the right containers are working. Double check to make sure.
Demo failure demonstration
✎Modified 2018-12-27 by AkbarShah96

The video is at https://vimeo.com/308295993.
Failure is not an option sorry.
AIDO Challenge (beta version!)
✎Modified 2018-12-27 by AkbarShah96
If after watching our object detector in action you cannot wait to build your own, you might want to stick around.
Aside from developing a CNN-based object detector, we have developed a framework that allows you to test the performance of your own object detector. This is analogous to the framework that CircleCi provides for unit tests, except this is targeted at performance tests.
We have created an additional (private) repository that contains testing images + labels in addition to an evaluator which compares labels it receives from an inference model with the ground truth. This results in a score which is displayed on the server. In the future, one of the metrics that the evaluator should be able to display is the prediction time and RAM usage which are crucial in the context of object detection in Duckietown.
As the user, once the framework depicted in the figure below is functional, you have to include your submission (inference model) in the /sub-objdet-OD folder within a docker environment, that will automatically get built when you submit to the challenge.

Unfortunately we have run into many issues while setting up a local server to test the interaction between submission and evaluator containers, which means little to no testing has been done on whether this pipeline works as expected.
Future works
✎Modified 2018-12-27 by AkbarShah96
- Better training data.
In dark lighting conditions our model would sometimes detect a duckiebot when it saw the white light from its own LEDs in the image. This could be improved by having more robust training data. The images used to train the model were also not labeled as good as required by the company.
- Object detection running on RPI with Movidious stick.
Right now, the object detector is run on the laptop and the duckiebot only provides the images. To run the object detector on the raspberry pi, a movidious stick can be used which provides the computation resources to handle a convolutional neural network.
- Improve speed.
Since computation resources are limited on the duckiebot, it is suggested to make the model as light as possible without compromising on accuracy.
- Aido Challange.
Test the AIDO challenge module and define an official Object Detection challenge for AIDO 2
- Temporal features
Use temporal features - possibly using odometry information
For any questions, please contact any of the team members:
David Oort Alonso (oodavid@student.ethz.ch)
Mian Akbar Shah (shahak@student.ethz.ch)
Yannick Berdou (berdouy@ethz.ch)
Guoxiang Zhou (guzhou@ethz.ch)