Operation - Make it See
✎Modified 2022-09-03 by liampaull
A Duckiebot in DB18 or above configuration.
Laptop configured, according to Unit C-2 - Setup - Laptop.
You have configured the Duckiebot as documented in Unit C-4 - Setup - Duckiebot SD Card.
You can see the output of the camera.
This section describes how to see what your Duckiebot sees.
Check the camera hardware
✎Modified 2021-03-22 by tanij
If you have a DB18 or DB19, it might be useful to do a quick camera hardware check as documented in Section 17.6 - Camera.
Viewing an Image Stream on Your Laptop
✎Modified 2021-04-04 by tanij
The imagery is streaming from your Duckiebot by default on startup. To see it, open a terminal on your laptop and run:
laptop $ dts start_gui_tools DUCKIEBOT_NAME
Note that in here you input Duckiebot ![hostname], do not include .local part.
This will start a container with access to the ROS messages of the Duckiebot. At the prompt, run:
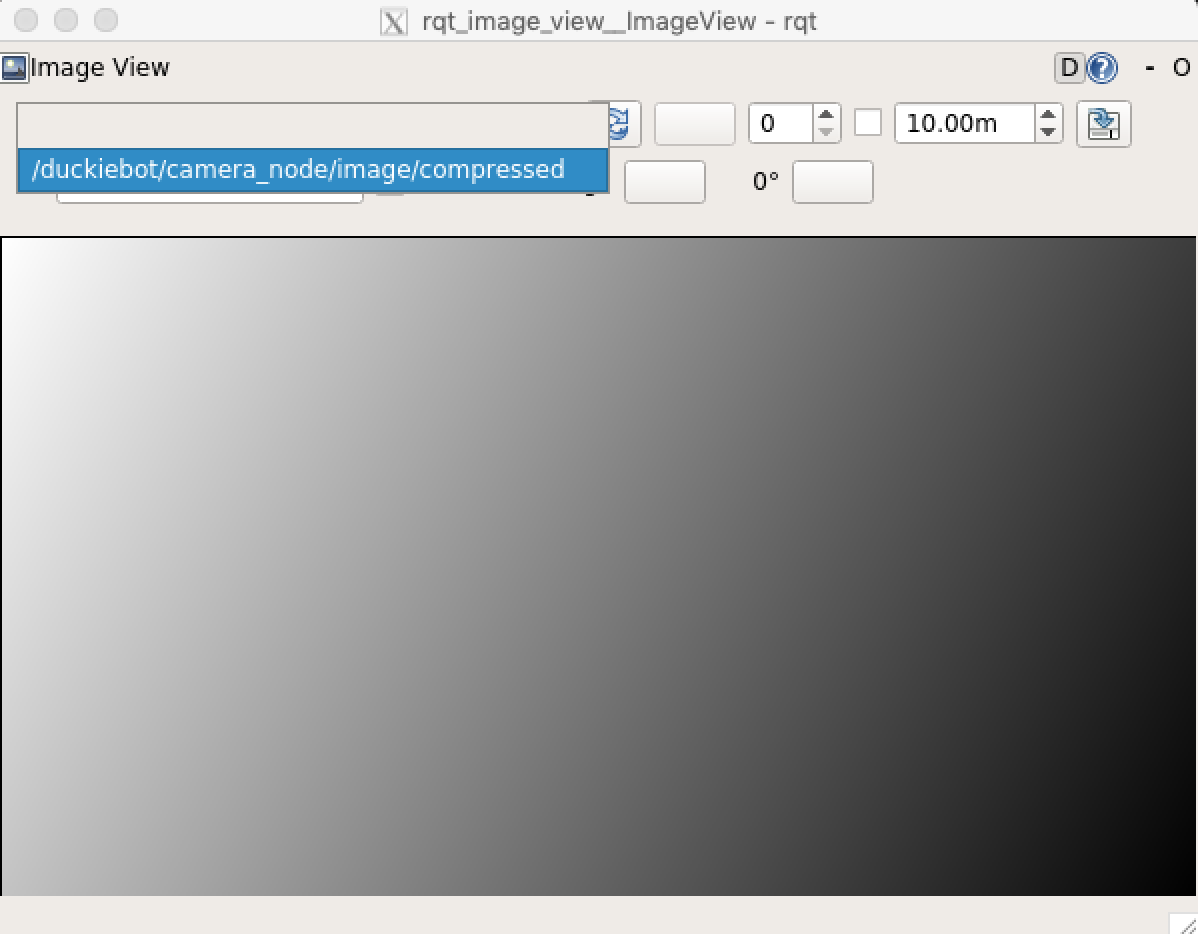
container $ rqt_image_view
The command will open a window where you can view the image.
You have to select the right topic from the drop-down menu:
Troubleshooting
✎Modified 2021-04-04 by tanij
I see a black image like this:

Remove the cap of the camera.
When I try to do rqt_image_view, I don’t see the window on my machine.
Sometimes the window does not successfully spawn on the first try. You can Ctrl+c to terminate the process before trying again.
libGL error when running dts start_gui_tools
If you have an error like that when running dts start_gui_tools or another command with a GUI on the Duckiebot, then you are likely having issues with an NVIDIA graphics card:
libGL error: No matching fbConfigs or visuals found libGL error: failed to load driver: swrast nvidia docker
This could occur on a computer that has two graphics cards, e.g., a NVIDIA GPU and an integrated Intel card. Switch to the Intel card by following the official guidelines for your OS and graphics card.
I don’t see any image.
use rostopic hz /hostname/camera_node/image/compressed and see if the image is being published. Images should be published at roughly 30 Hz.
For more information about rostopic, see Unit C-12 - Operation - Using start_gui_tools, ROS tools and no-vnc.
you can see the images as your robot sees them with rostopic echo /hostname/camera_node/image/compressed. Ctrl+c on the terminal once you’ve seen enough.
My image topic is not being published.
Check that the duckiebot-interface is running
Open the Portainer interface and check the running containers. You should see one called duckiebot-interface, using image duckietown/dt-duckiebot-interface:daffy-arm32v7.
You call also determine this by running:
$ docker -H DUCKIEBOT_NAME.local ps
and look at the output to find the Duckiebot interface container and verify that it is running.
If that image is not running, you should manually start that or check to see if you init_sd_card procedure was correct.
To manually start the duckiebot-interface, do:
laptop $ docker -H DUCKIEBOT_NAME.local run --name duckiebot-interface -v /data:/data --privileged --network=host -dit --restart unless-stopped duckietown/dt-duckiebot-interface:daffy-arm32v7
The camera is not detected from Duckiebot
(DB18, DB19 only) remove the battery pack and check the camera cable for damage.
The images are out of focus.
The camera focus can be manually adjusted by rotating the lens of the image sensor. As always with dealing with hardware, exercise care and do not use force.
I cannot rotate the lens and change the camera focus.
You need to break the glue. Very occasionally cameras come with the lens glued in place. Apply a bit more force the first time you adjust the lens to break the glue’s adhesion.
Viewing the image in no-vnc
✎Modified 2020-08-23 by frank-qcd-qk
For instructions using the no-vnc tool, see here
Viewing the image stream on the Dashboard
✎Modified 2020-08-04 by frank-qcd-qk
If you followed the instructions in Unit C-8 - Setup - Dashboard, you should have access to the Duckiebot dashboard.
Open the browser and visit the page http://hostname.local/. Login using your duckietown token, and select robot panel on the left hand side navigation bar. Once selected you should see mission control page there. If you are unfamiliar with the dasboard, you can find more information here: Section 9.1 - What is in the Dashboard?
The bottom of the page shows the camera block. You should be able to see the camera feed in the camera block, as shown in the image below.

By default, the camera stream is throttled down to 8 frames per second. This is to minimize the resources used by your browser while streaming images from the robot. Feel free to increase the data stream frequency in the Properties tab of the camera block.
If you see a black image in the camera block, make sure that you removed the protective cap that covers the camera lens of your Duckiebot.